


90+ DIY Christmas Gift Wrap Ideas
A beautifully wrapped present really shows someone you care. These clever do-it-yourself ideas are sure to impress everyone on your Christmas gift list without breaking the bank.
Wrap It Up
For most gift-givers, taking the time to beautifully wrap presents is as much a part of the gift as the package's contents. Whether you're shopping for family, friends, pets or coworkers, follow our tips for gorgeous gift wrap looks that are easy to replicate — even for a gift-wrapping novice.

Photo By: Derek Trimble; Styling by H. Camille Smith
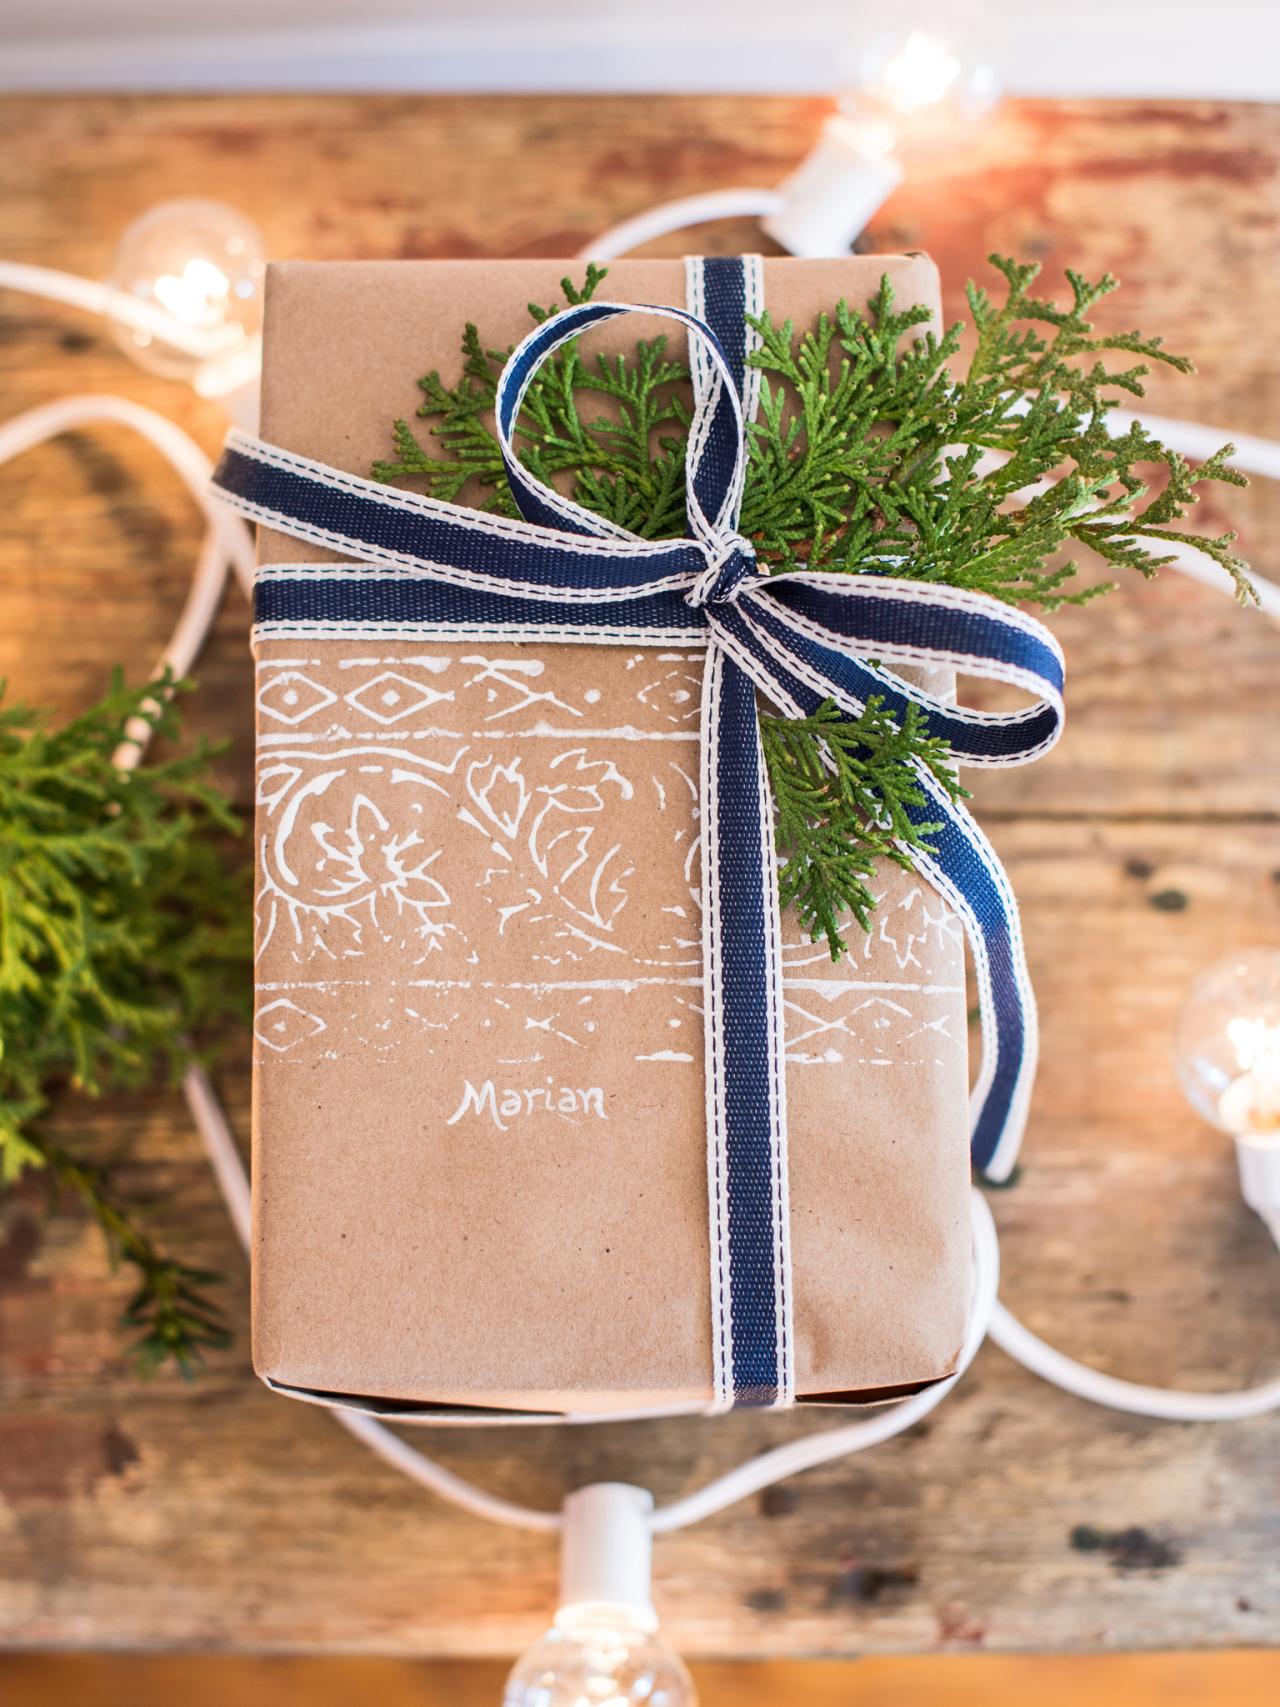
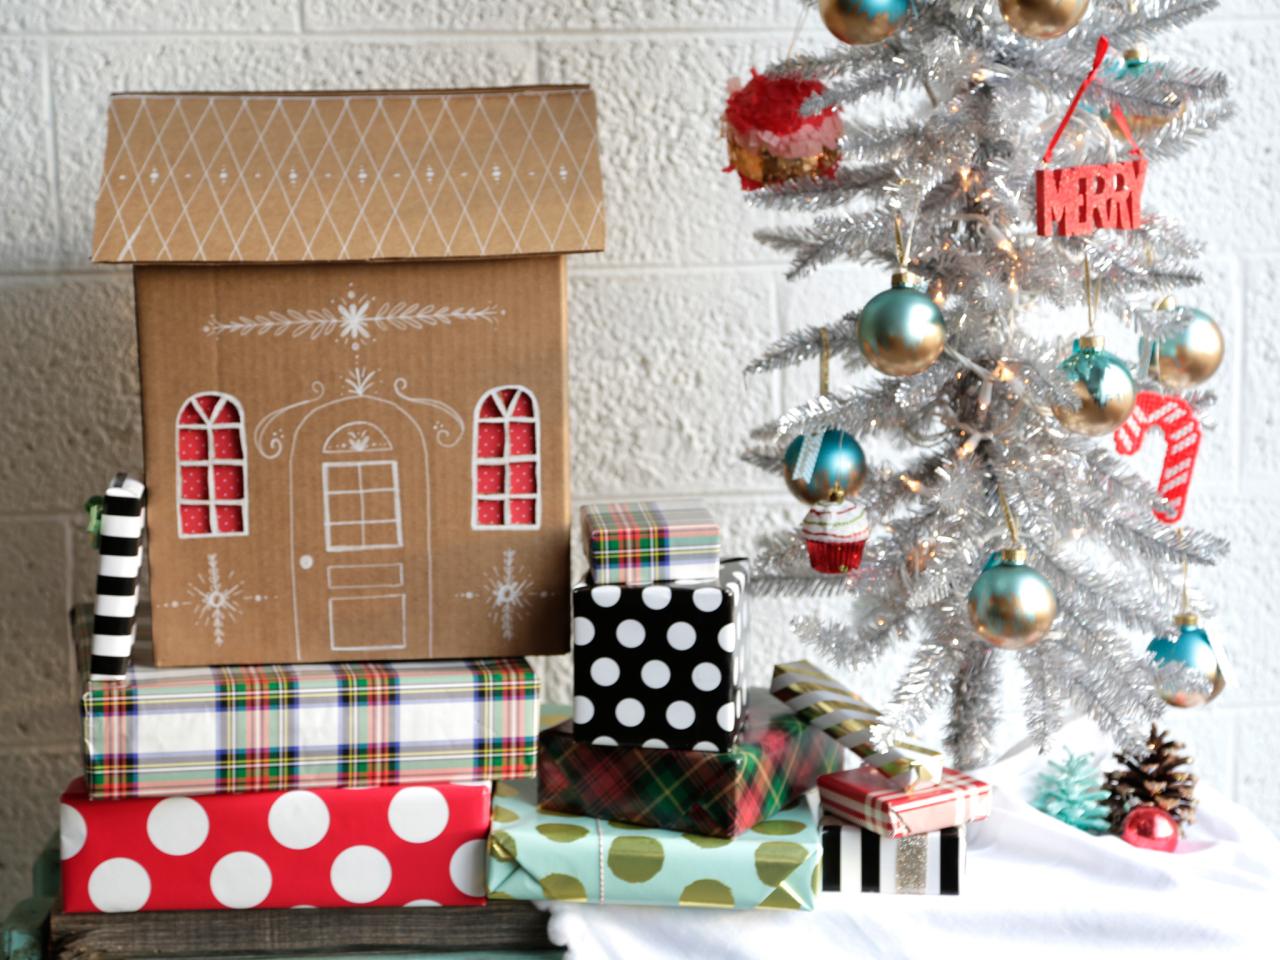
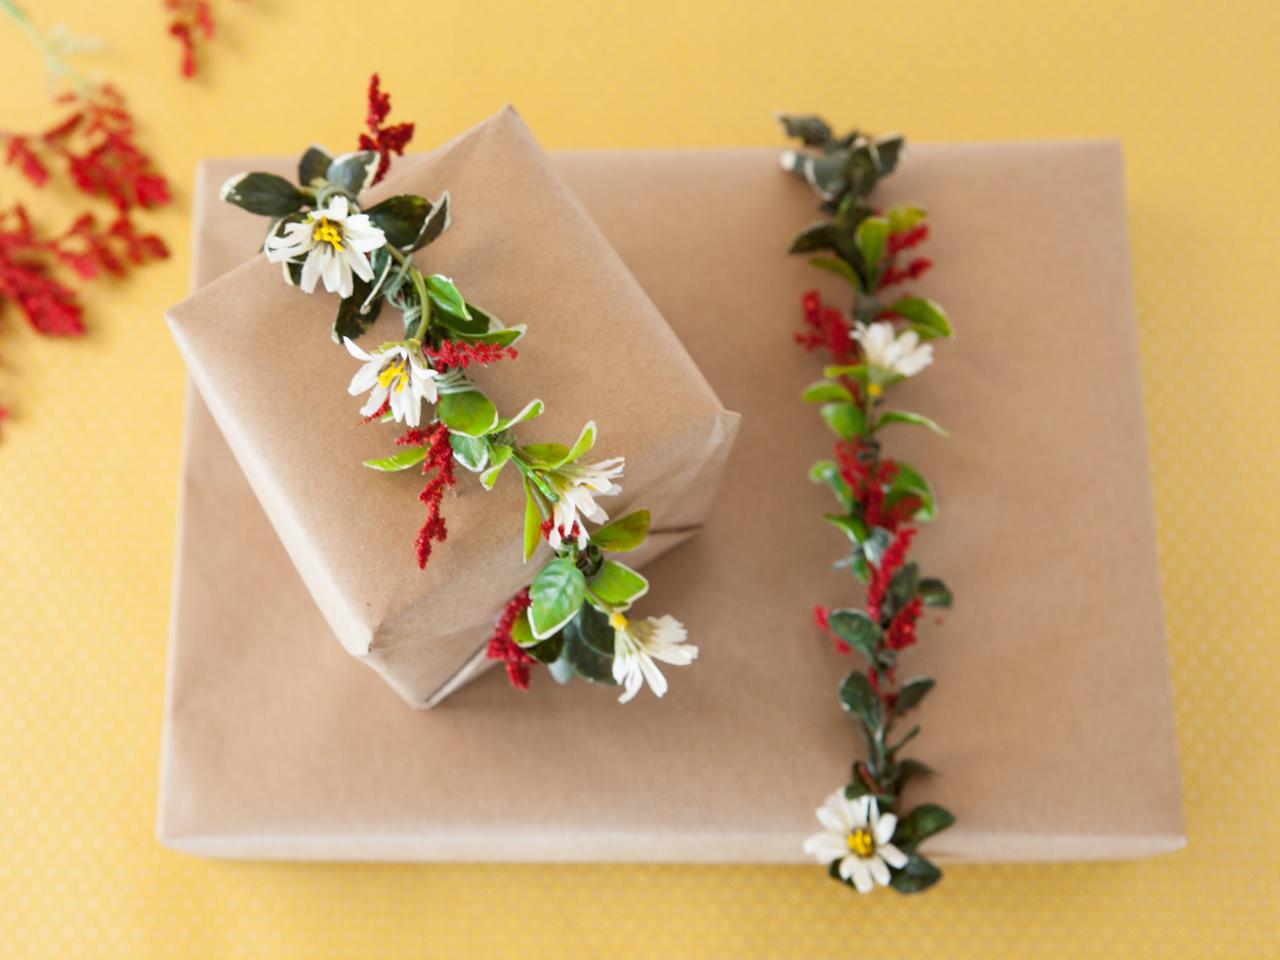
Stamp It On
Give inexpensive craft or butcher paper an artistic update with a woodblock stamp and white ink. Add the recipient's name with a white paint pen and tuck a bit of fresh greenery under the bow for a woodsy scent.

Photo By: Marian Parsons
Put Vintage Finds to Work
Gift exchange surprises have never looked so good. Give a plainly wrapped gift a touch of holiday magic by sliding on a vintage pin. Easy to source at estate sales, church bazaars and thrift stores, these Christmas cuties can typically be found for a few dollars or less (We paid just 50 cents for this adorable enamel and rhinestone brooch!).
Photo By: Derek Trimble; Styling by H. Camille Smith
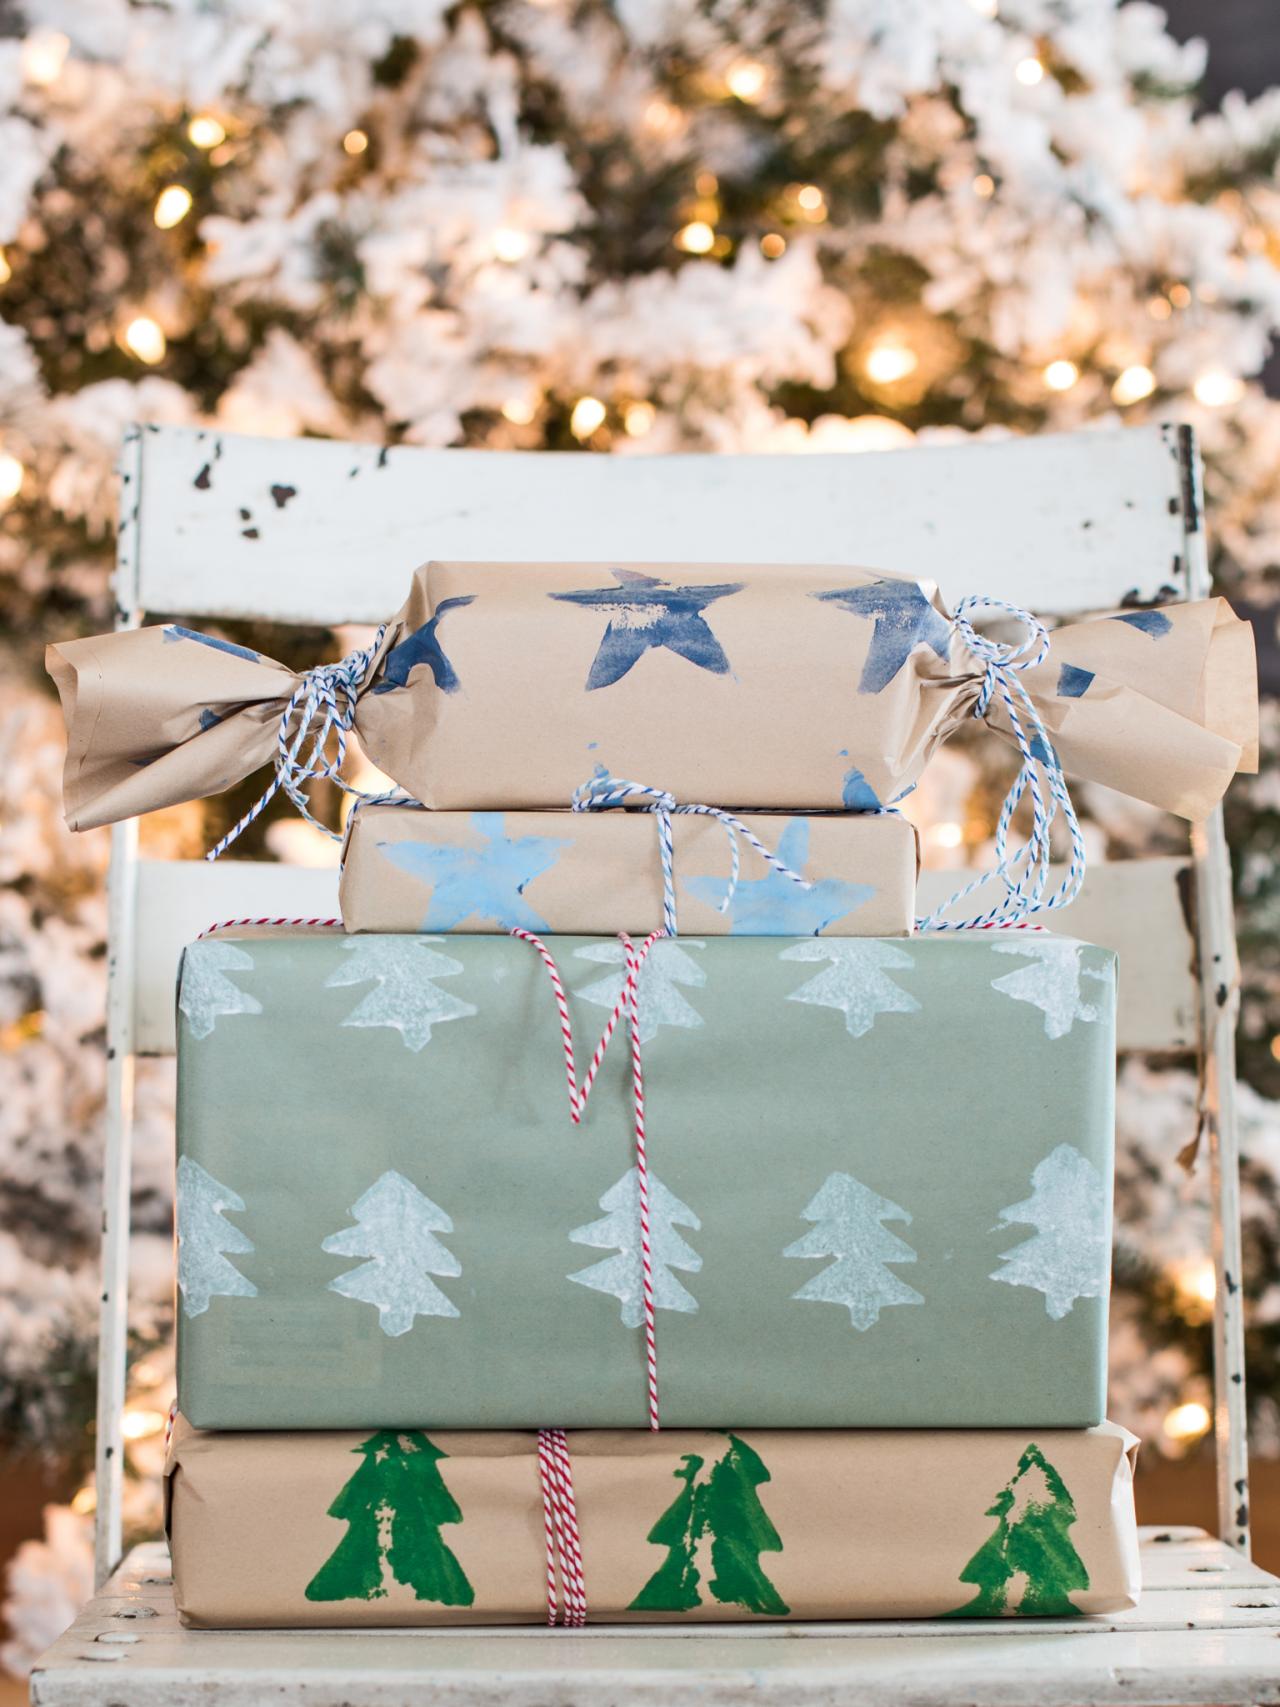
Give Potatoes New Purpose
Instead of purchasing a roll of wrapping paper at the store, bring your kids around the table to make custom hand-stamped paper with potatoes and paint. This old-school craft project is a great way to get kids involved in the season of giving.
Photo By: Marian Parsons
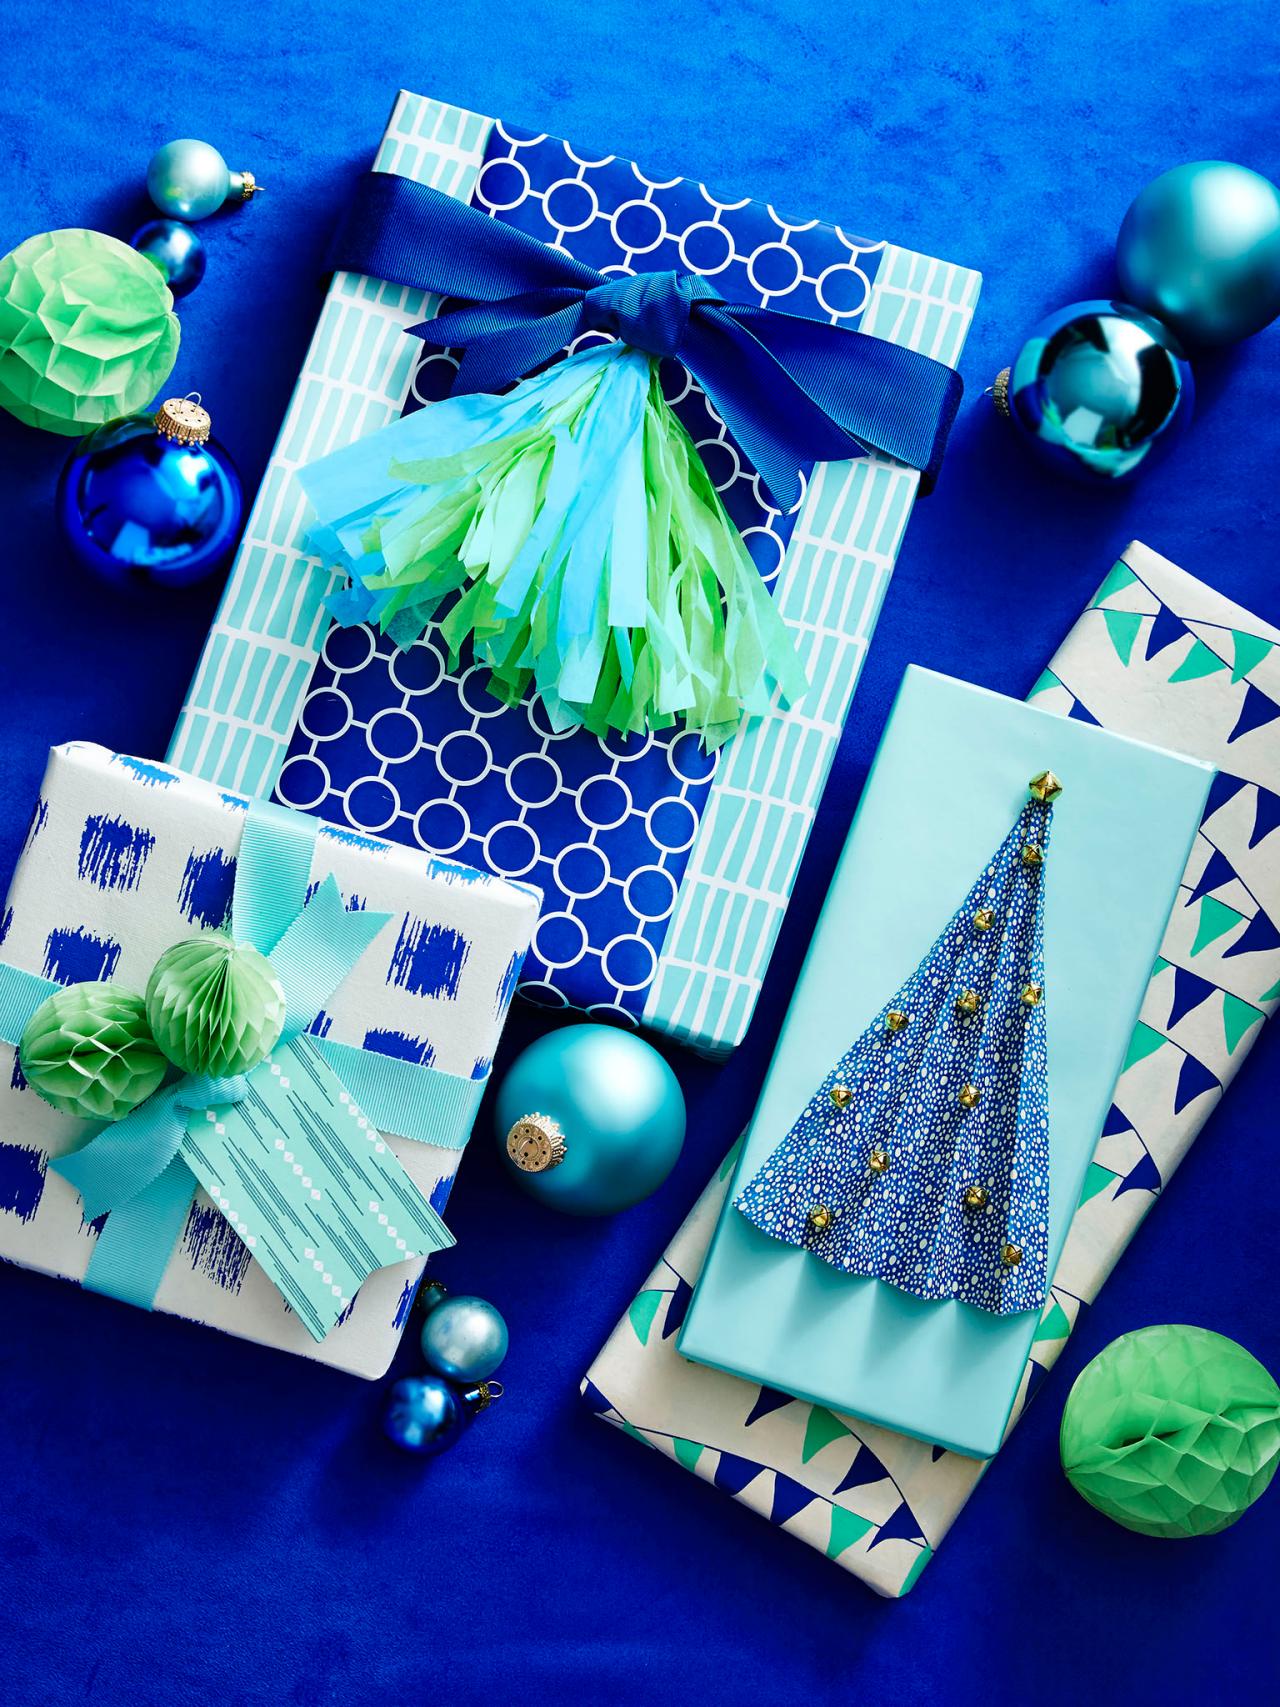
Pick a Palette
Layering gift wrap and toppers in various patterns featuring the same color family, like the cool blues and greens here, is a foolproof trick for creating great-looking gifts.
Photo By: Emily Kate Roemer (styled by Matthew Gleason)
Say It With a Stencil
Sturdy white butcher paper creates the perfect blank canvas for stenciled-on holiday designs; the paper's thickness ensures that it won't pucker and wrinkle from the moisture in the paint. To get this look: Cut paper to the size you'll need and plan the stenciled design's location. Position stencil, then apply acrylic craft paint using a stencil brush or pouncer. Allow paper to thoroughly dry flat before wrapping gift.
Photo By: Marian Parsons
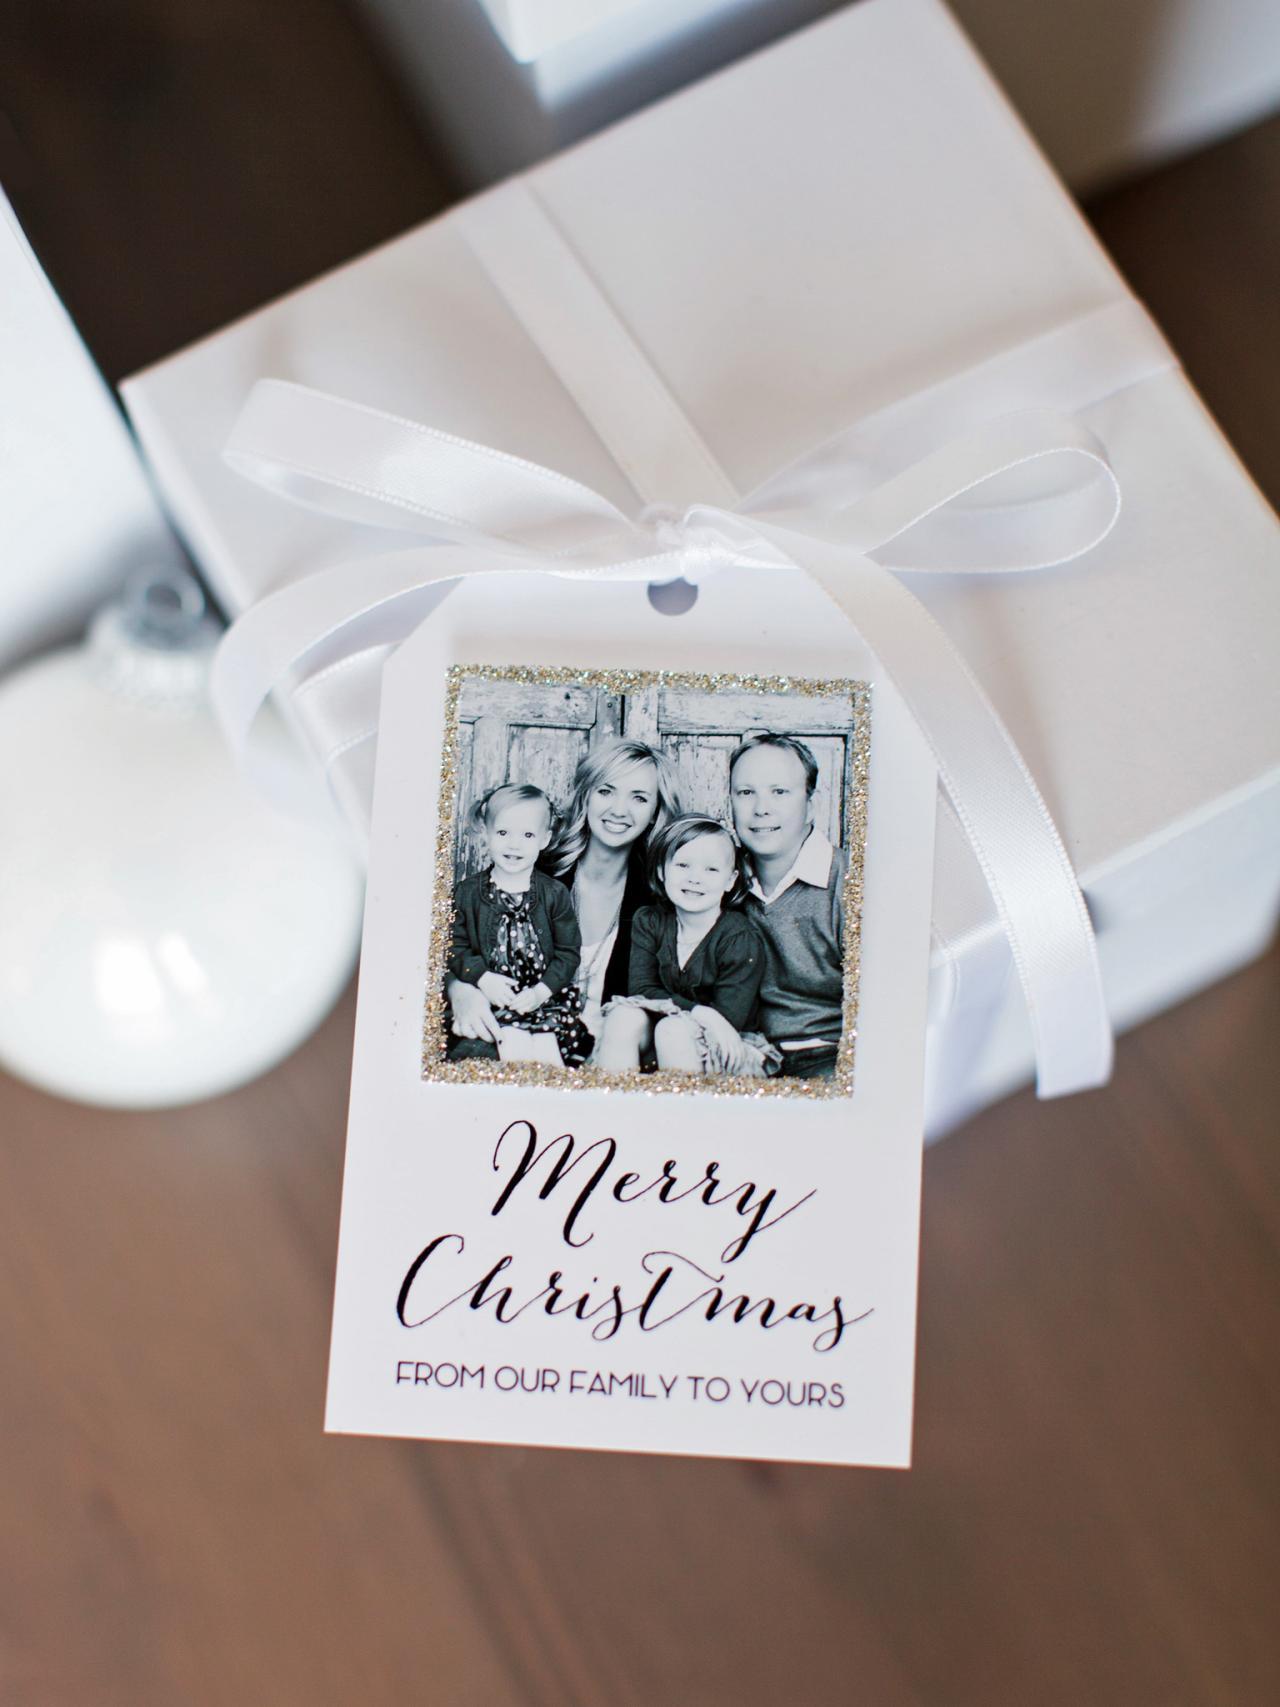
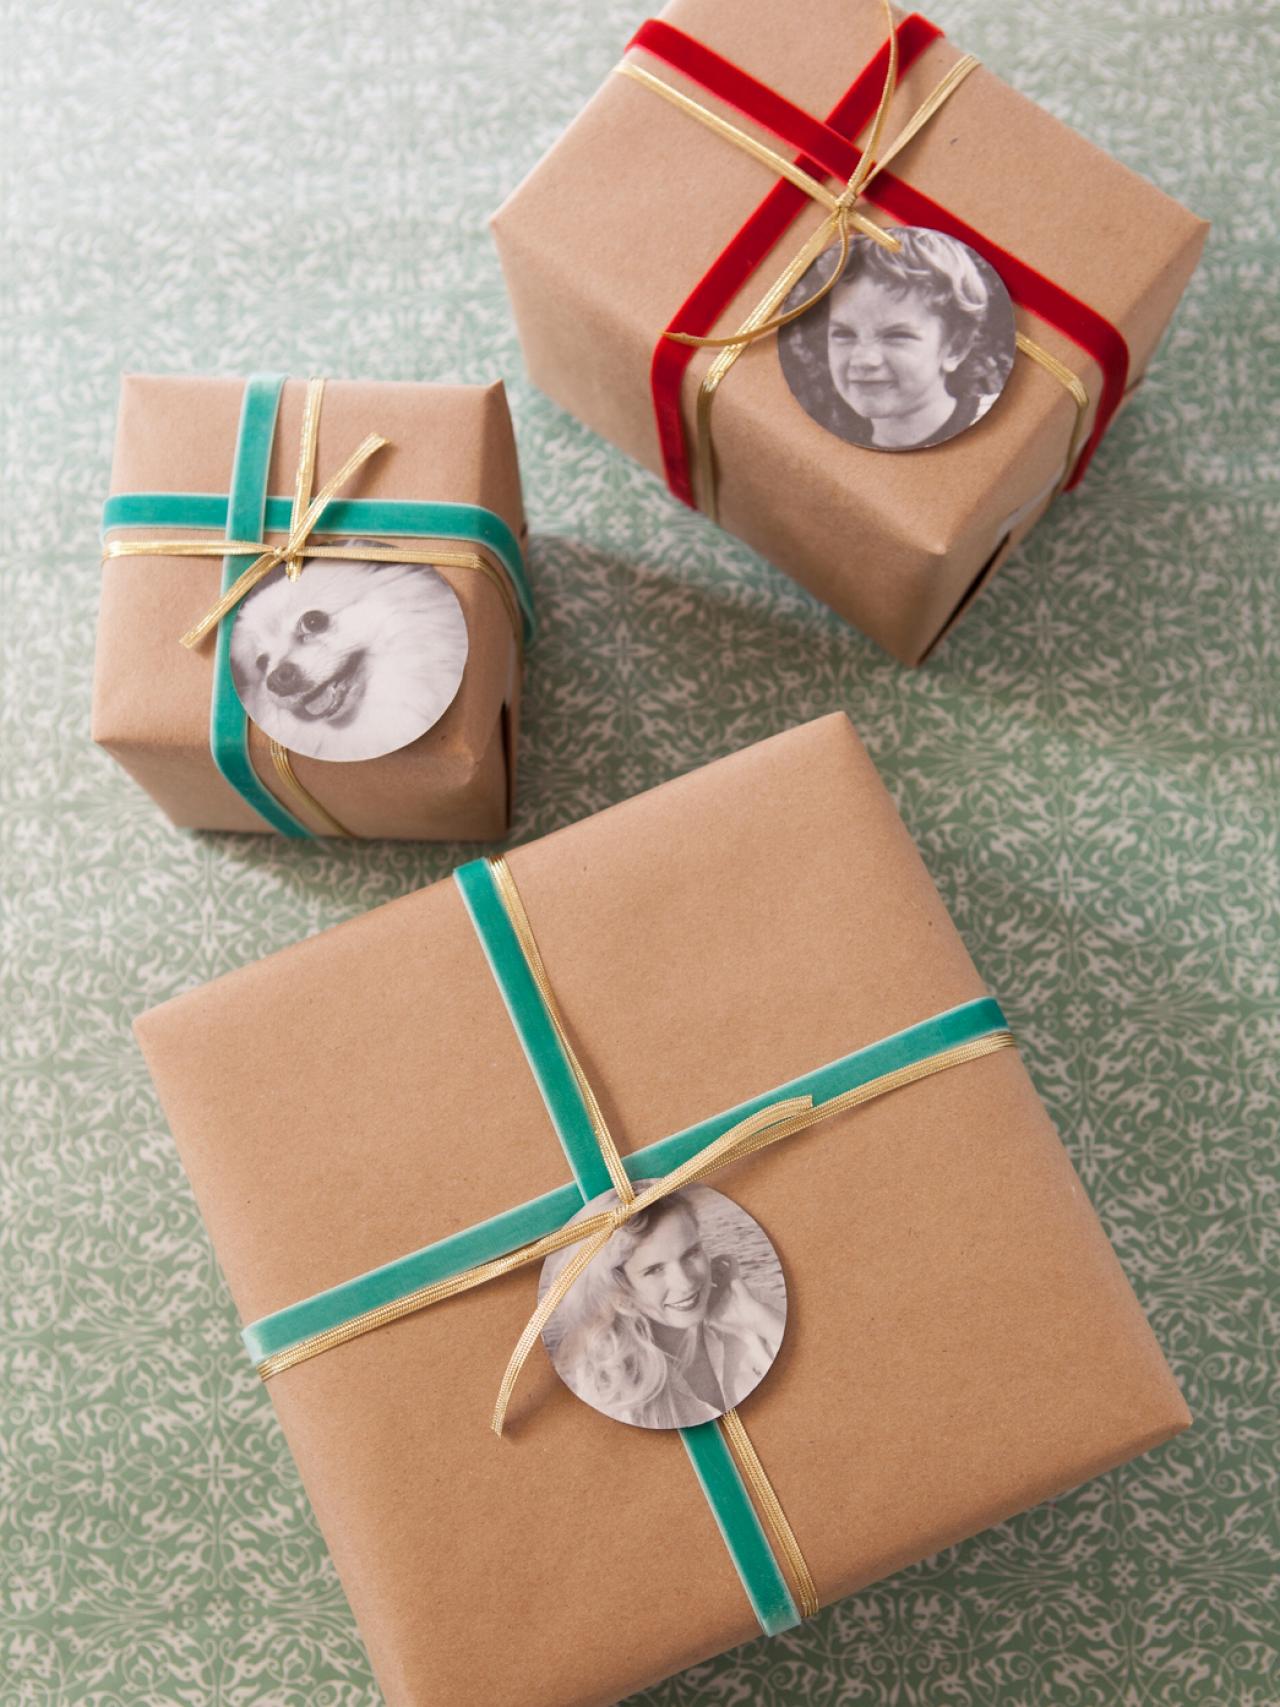
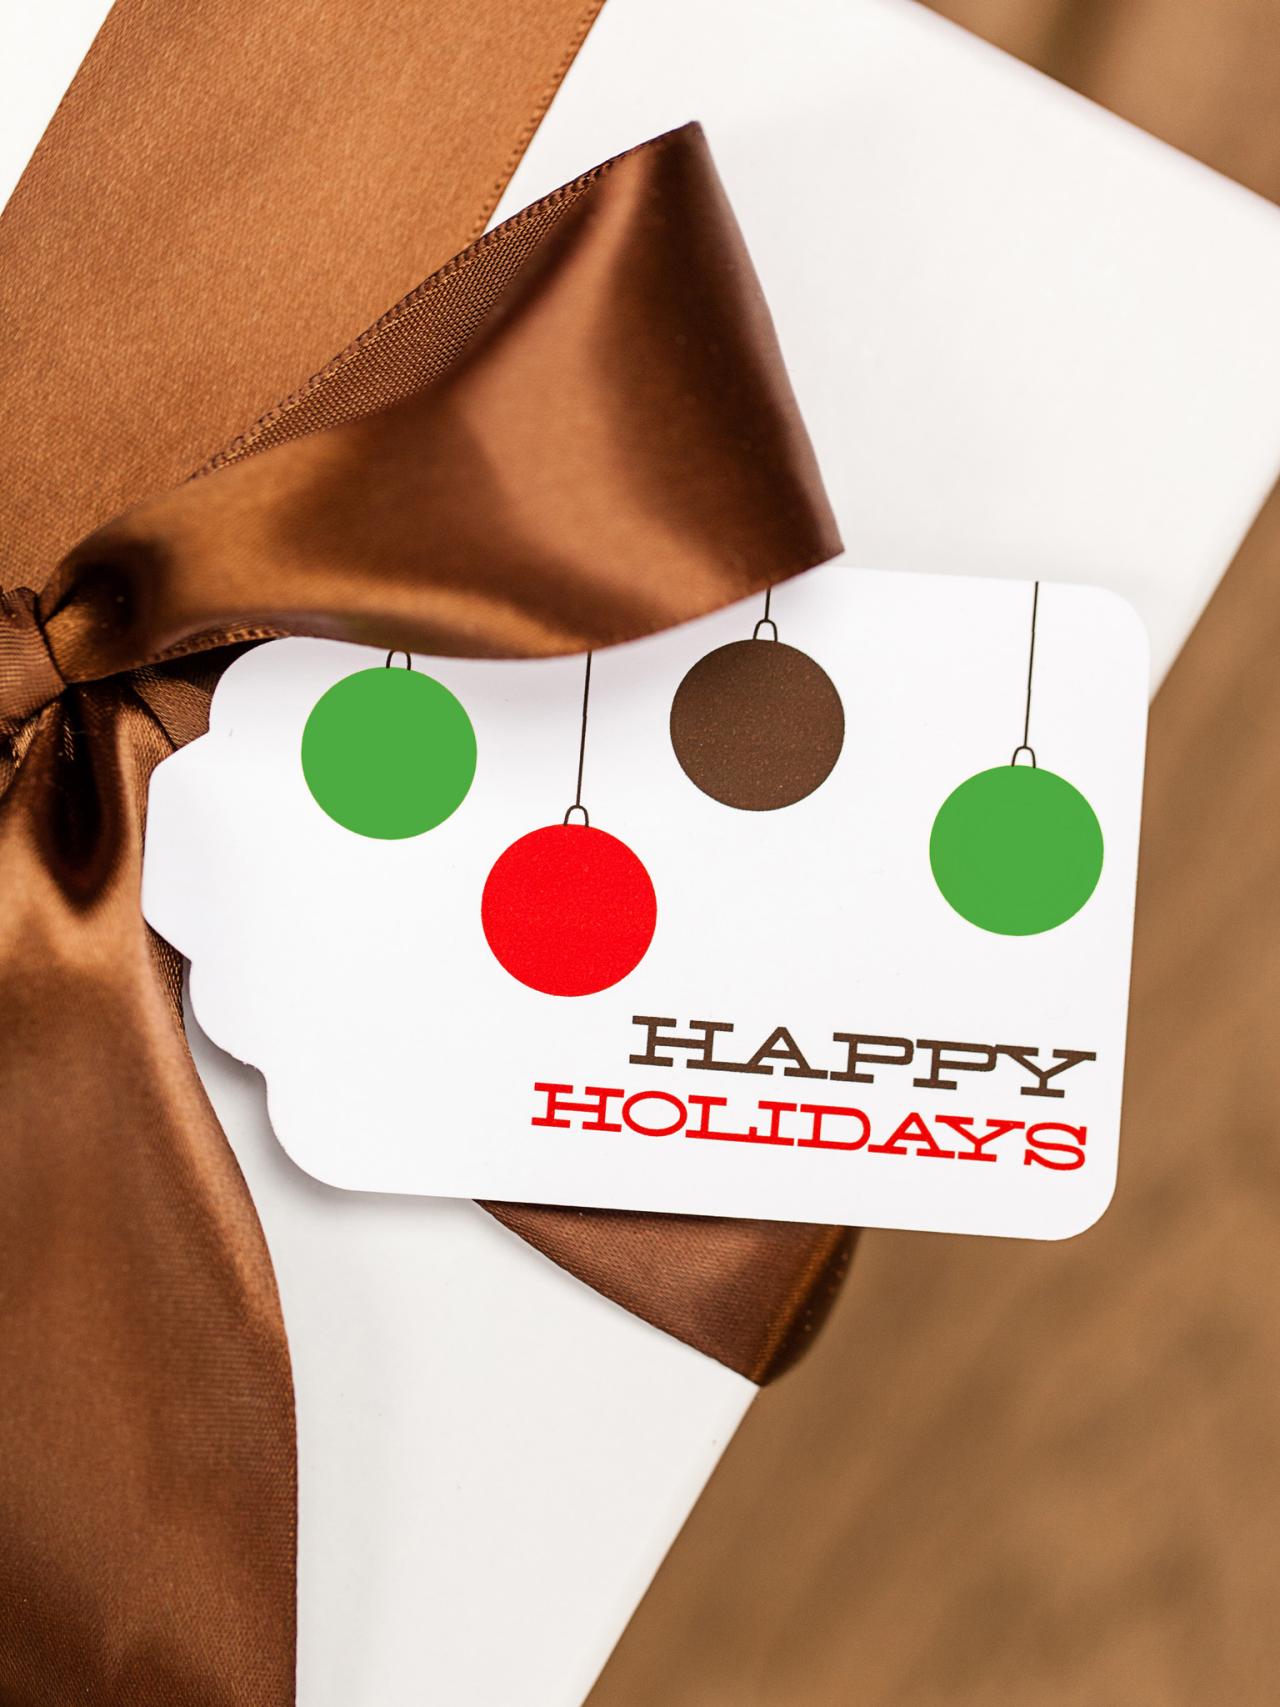
Pop In a Pic
A handmade tag makes a beautifully wrapped gift even more special. Print our free template onto white card stock then top with a 2" x 2" family photo for a uniquely personal tag. Tip: Add a bit of glitz by glittering the edges of the photo before attaching.
Photo By: Picasa ©ten22 studio 2013
Add a Paper Posy
Patterned red card stock, folded in half, then cut into basic flower petal shapes is an easy way to create a beautiful stand-in for a poinsettia. Use your completed posey as a gift topper or make several and string them together as a colorful holiday banner.
Photo By: Emily Kate Roemer (styled by Matthew Gleason)
Wow With Wired Ribbon
Head to your local craft or fabric store for spools of fabric ribbon with a handy, hidden secret: thin wire tucked into each of the ribbon's sides. The wire adds stiffness that allows you to create three-dimensional bows for a pro-wrapped-gift look. Complete the look by tying on a sleighbell or sliding in fresh-clipped greenery.
Photo By: Derek Trimble; Styling by H. Camille Smith
Weave Paper
This gift wrap technique is an inexpensive way to jazz up a simple gift using colored card stock that you have on hand. To make, cut 1/4" strips of card stock in white, black, red, dark green and light green. Lay 20 strips right next to each other on a table. Tape down one end of the strips. Using 20 more strips, weave each strip under and over the taped strips. Continue until you've created a pretty woven pattern. Wrap the ends of the woven paper piece around a gift box wrapped in white paper, and secure it with tape on the back.

Raid Your Sewing Stash
Use leftover fabric trim, like rickrack, gimp or bullion, instead of ribbon, to give your gifts a fashion-forward finish. Tuck in a few sprigs of fresh greenery or glittered pinecones before presenting to the recipient.
Photo By: H. Camille Smith
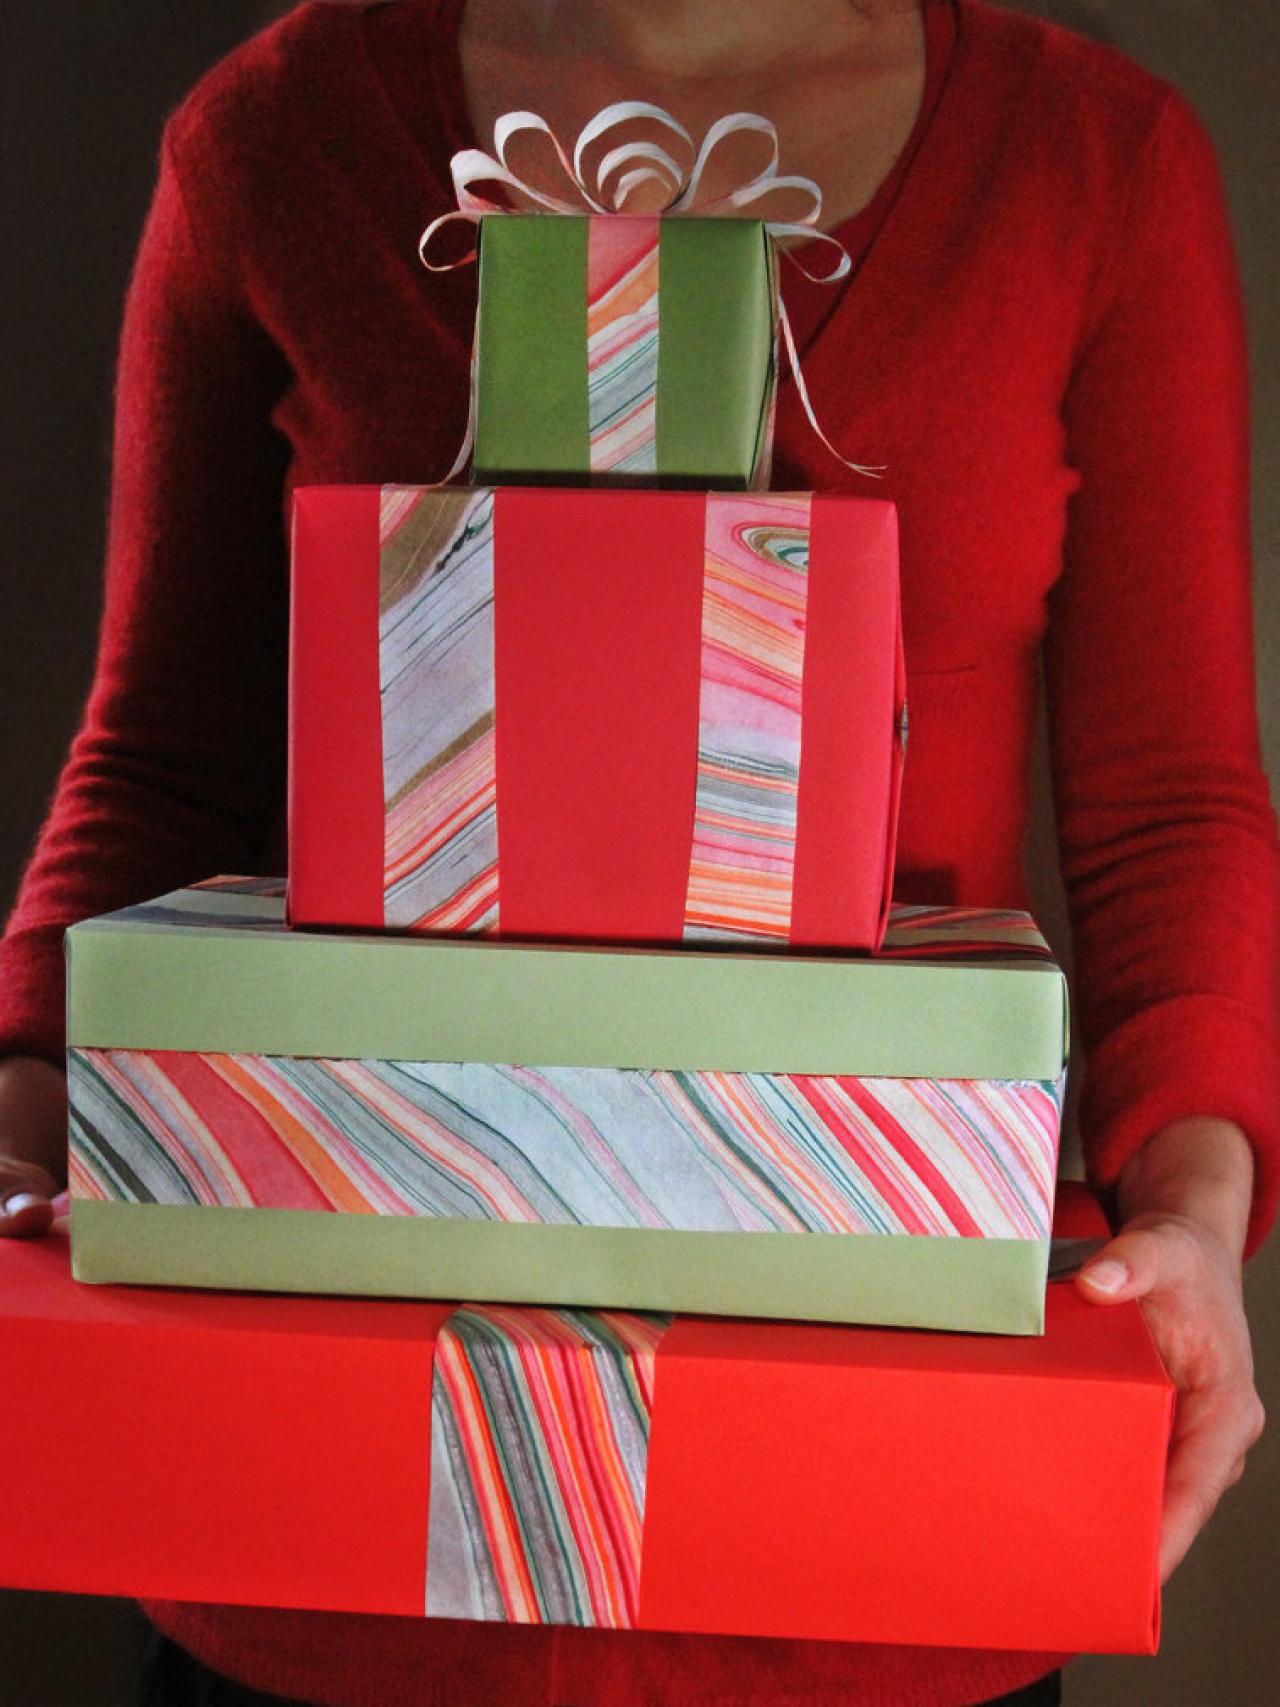
Think Beyond Red + Green
Our friends at HGTV Magazine swapped regal purple hues for standard holiday shades to create this sophisticated twist on the traditional red + green pairing.
Photo By: Emily Kate Roemer (styled by Matthew Gleason)
Upcycle Empty Shipping Boxes
If like most of us, you have a recycling bin filled with cardboard shipping boxes, pull out a few to display as pretty porch gifts. Wrap them in leftover gift wrap, then stack by a well-sheltered front door as nearly free holiday decor. If you're concerned about porch pirates, only set the empty boxes out right before holiday guests arrive — or try one of the hilarious pirate-revenge videos online to teach sticky-fingered thieves a lesson.
Photo By: Derek Trimble; Styling by H. Camille Smith
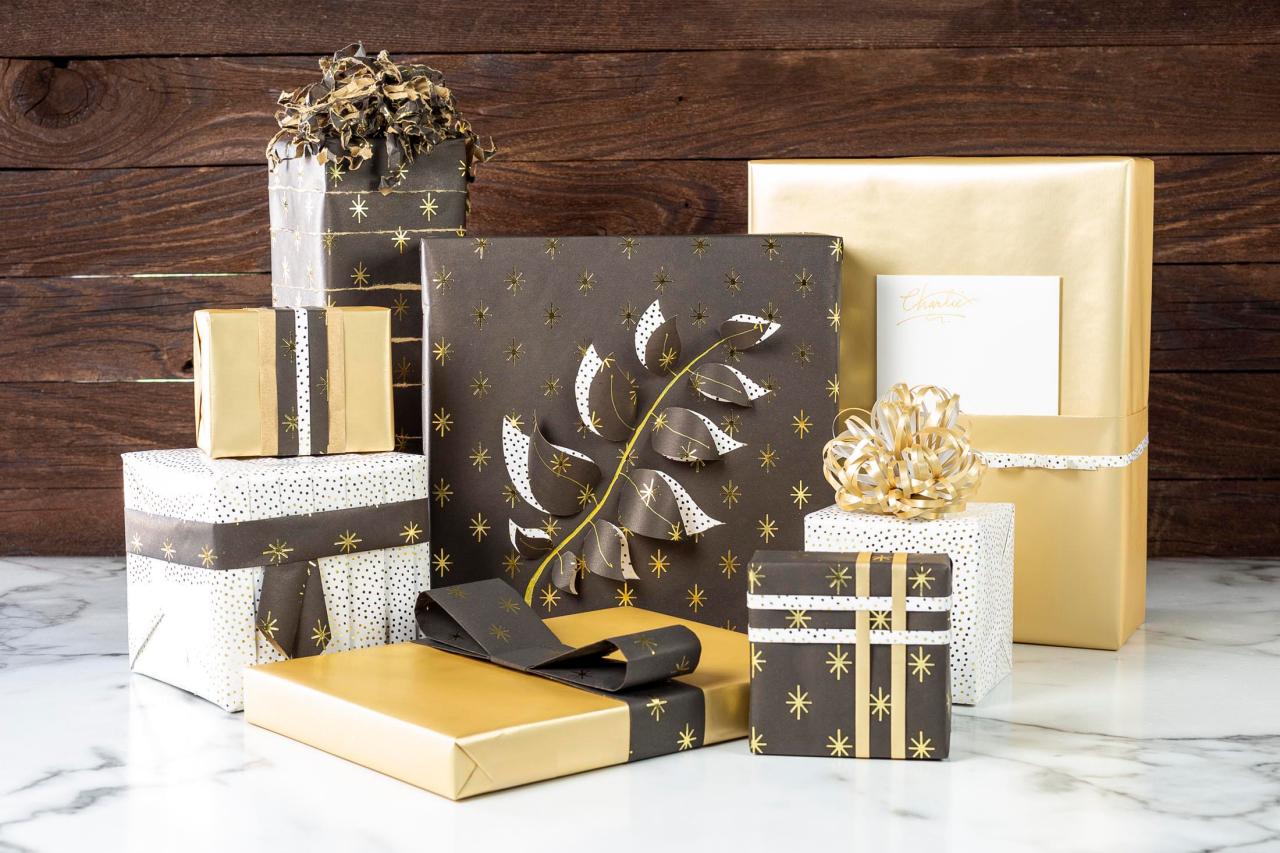
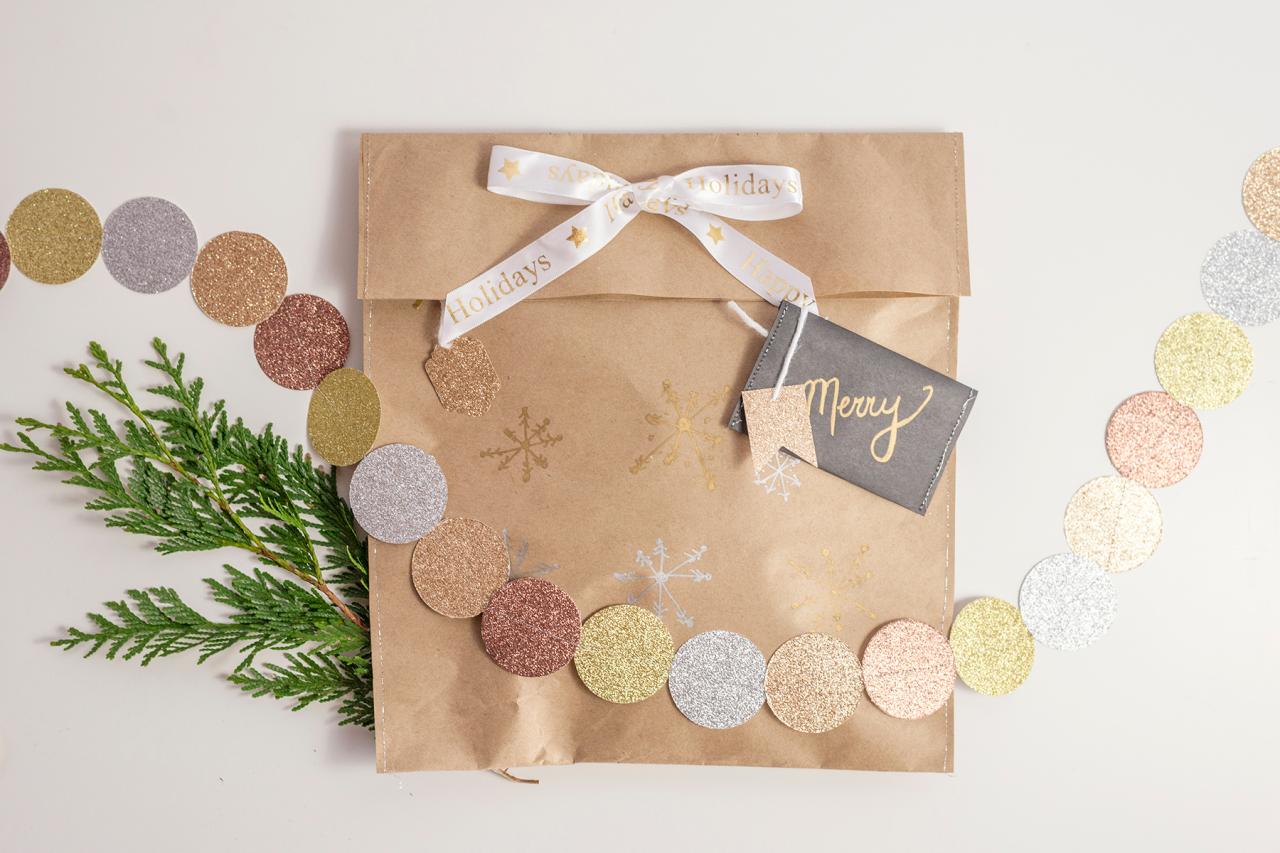
Mix In Some Metallics
'Silver and gold' aren't just lines from a classic Christmas cartoon, they're also the perfect neutral to add a little sparkle under your tree. Create visual interest by mixing the different metallics like gold, silver, copper and bronze.
Add One of Our Free Printables
Kids will love these cute printable tags that feature the Head Elf himself. Just print them onto white card stock and cut them out.

Photo By: Picasa ©ten22 studio 2013
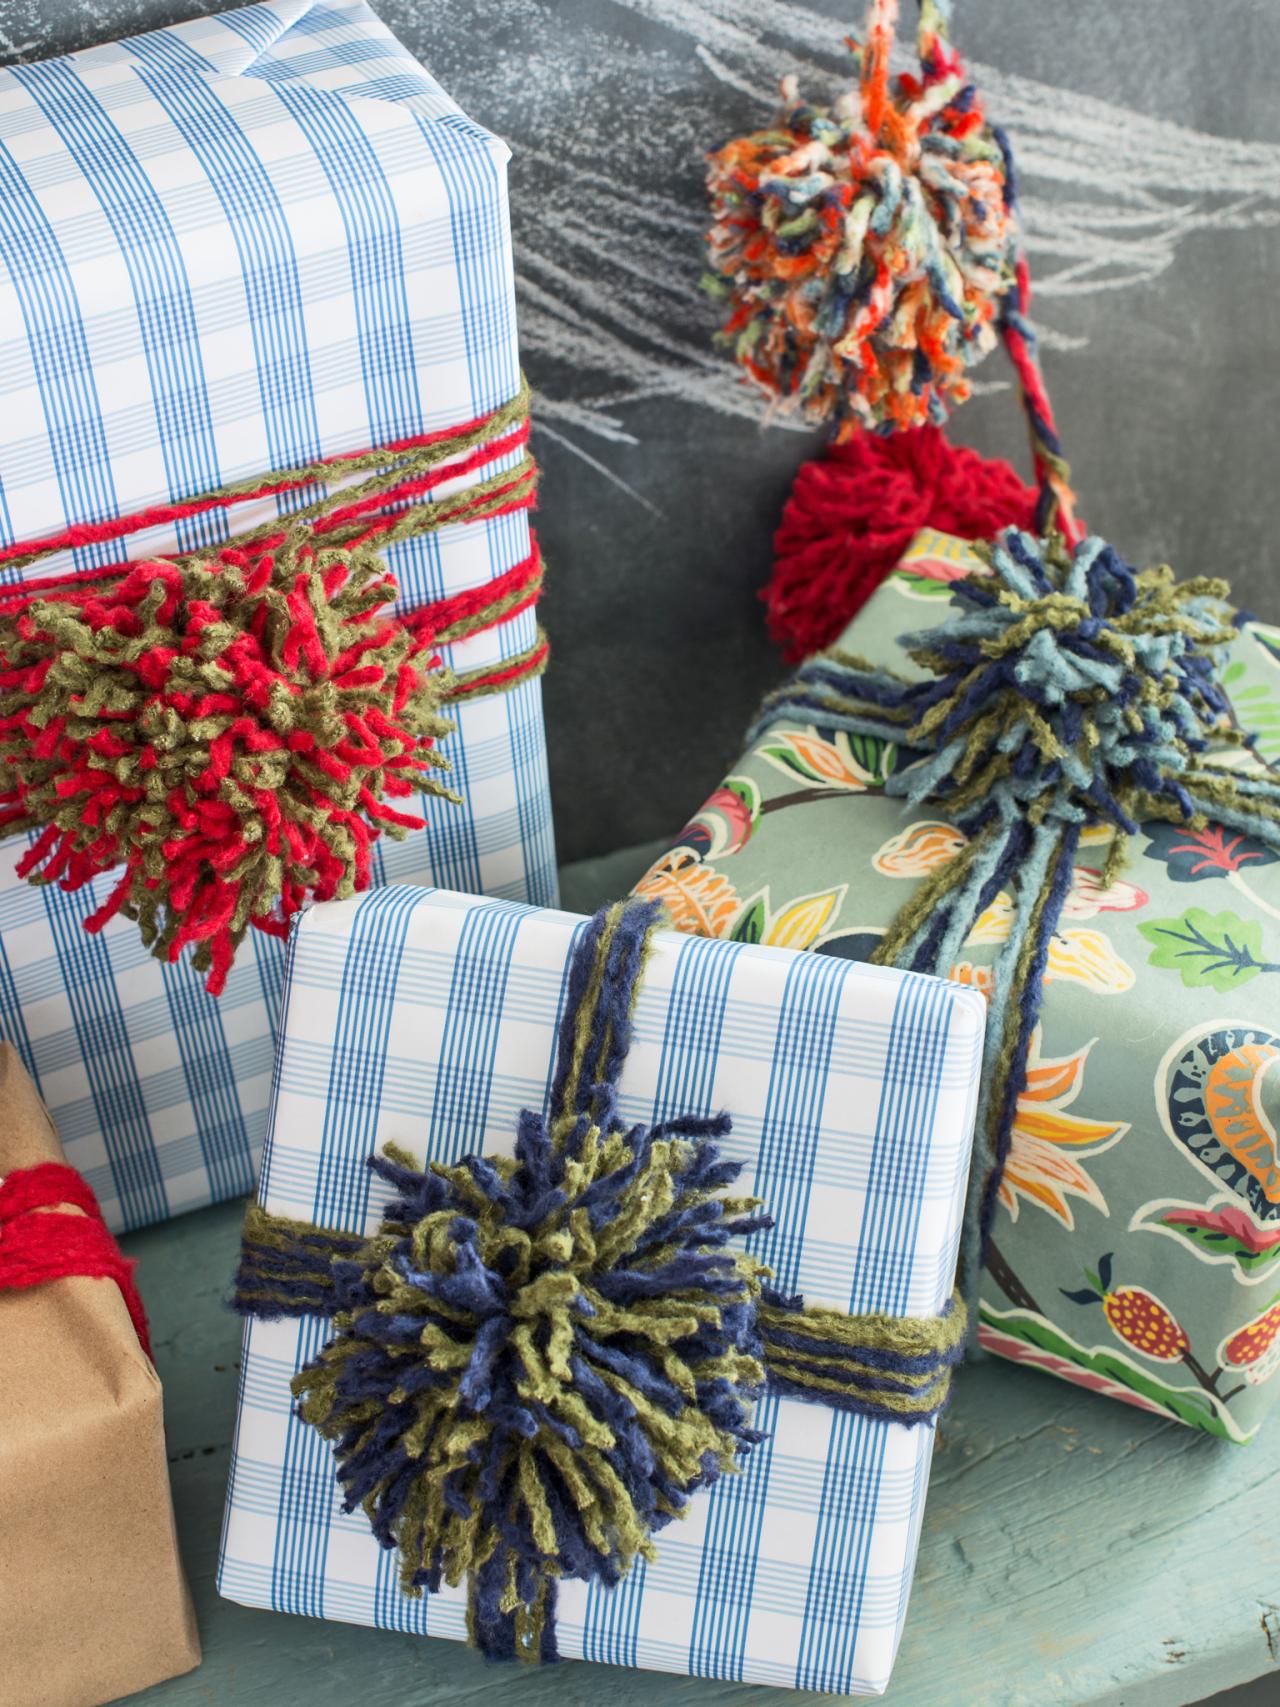
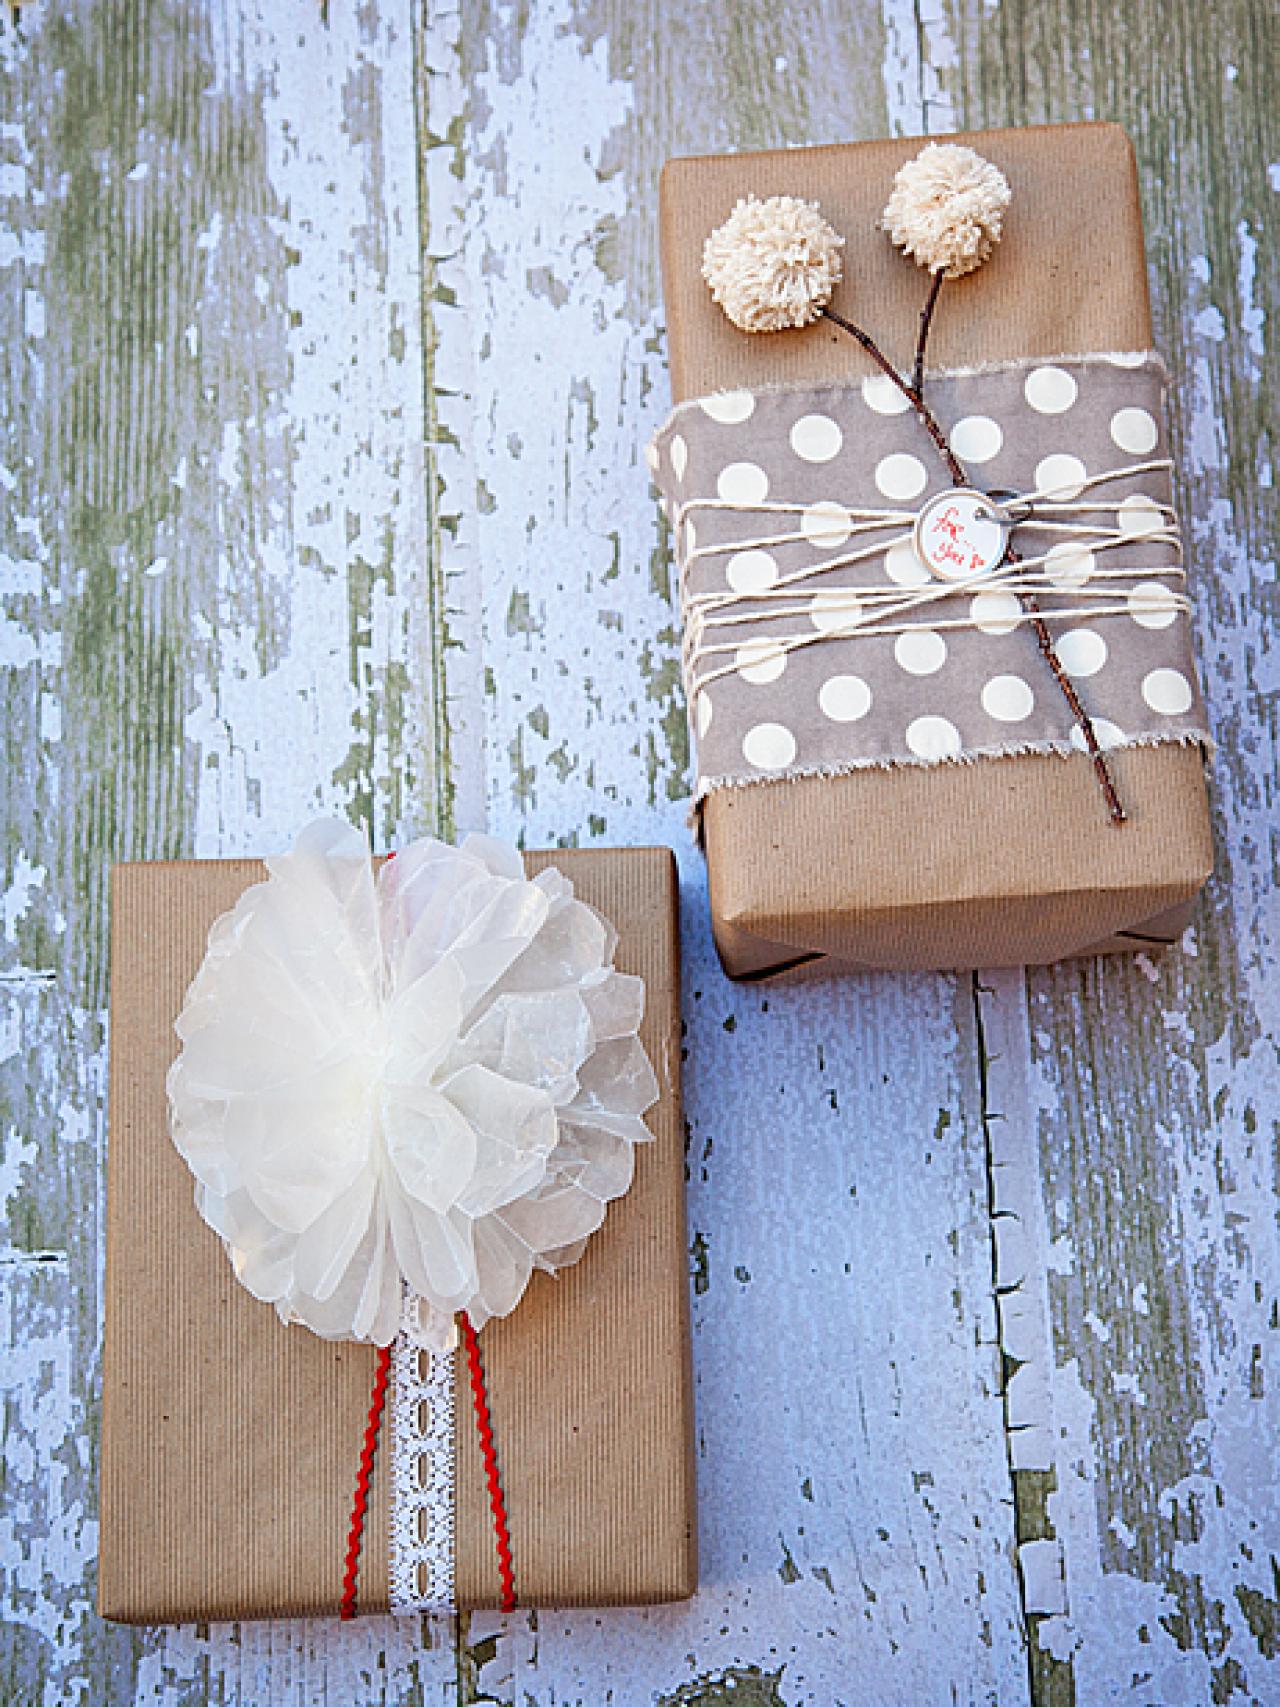
Tie on a Pom-Pom
Kids will love helping you make these colorful yarn pom-poms that are easy to craft and are a playful substitute for a traditional bow.
Photo By: Marian Parsons
Go for the Glam
Don't limit playful colors, like hot pink, to spring and summer use; this happy hue will add just as much kick to your holiday packages. Paired with fashion-forward black, white and gold, the look-at-me color is gorgeous, not girly.
Photo By: Emily Kate Roemer (styled by Matthew Gleason)
Make a Monogrammed Gift Topper
Forget traditional ribbon bows and top your gifts with a yarn-wrapped initial instead. Older kids and crafty teens will want to try this easy project to create personalized packages that stand out from the pack.
©Brklyn View Photography
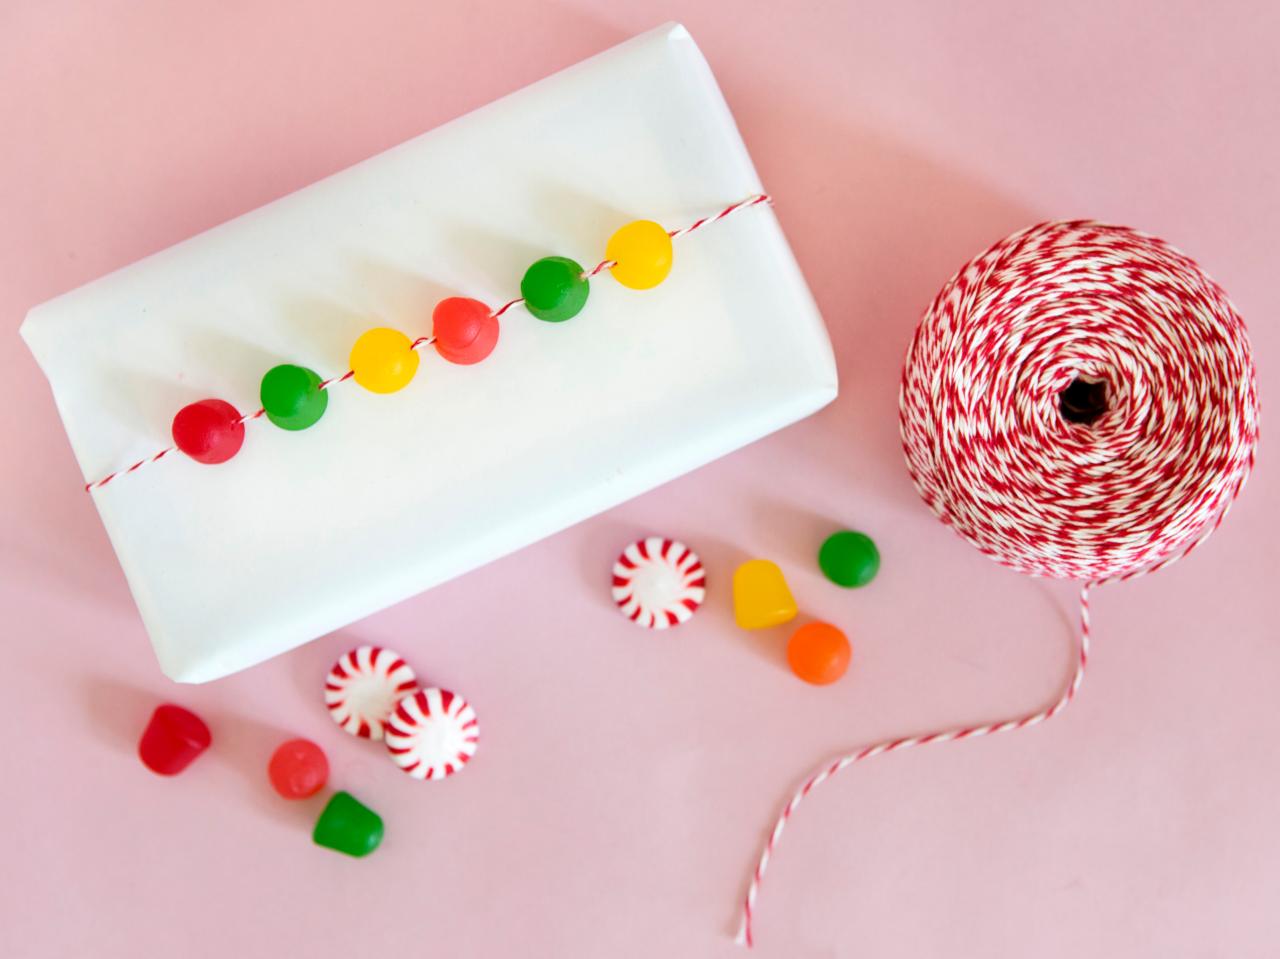
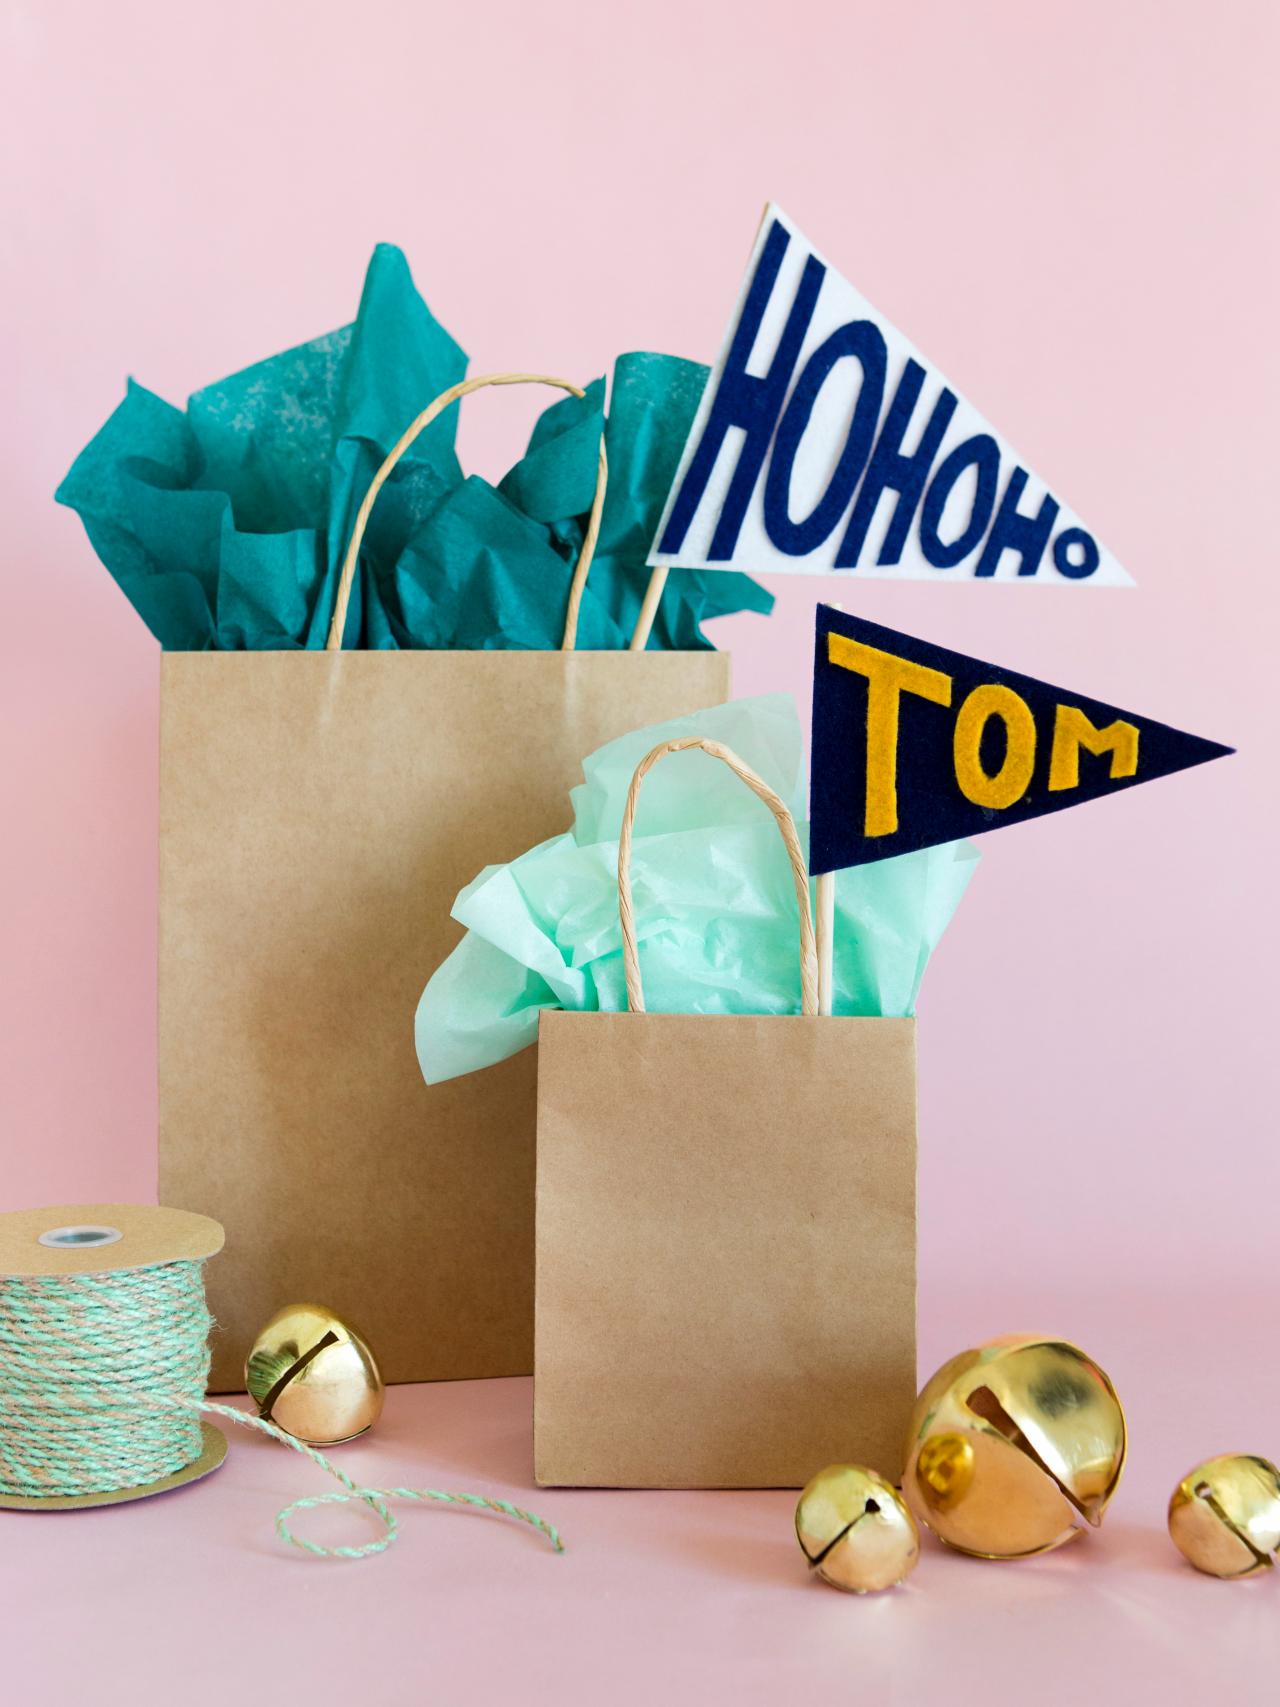
Try a Playful Palette
Cheery colors, like pink, coral and turquoise, are sure to add some pep to your presents. Top with holiday items like candy canes or unbreakable ornaments in coordinated colors for a seasonal finishing touch.
Photo By: Emily Kate Roemer (styled by Matthew Gleason)
Splurge on Velvet
Nothing takes a wrapped gift from ordinary to extraordinary quite like velvet ribbon. Available in a wide range of colors, widths and oh-so-touchable, the tactile topper only costs a few more cents per gift but is sure to make a big impression on the recipient.
Photo By: Derek Trimble; Styling by H. Camille Smith
Give It an Initial Stamp
Traditional wax seals signify the recipient of a lovely gift. Use kraft paper to wrap your gift, and tie twine in both directions. Drip melted wax on top of the twine and press with a metal wax seal stamp with the first initial of the recipient.
Make It Monochromatic
Go ahead — wrap all your gifts in your favorite color. But to add visual appeal to your gifts, pick patterned wrapping paper. Group similar gifts together by tying more than one gift with the same piece of flat, solid-colored ribbon — in your go-to hue, of course.
Go for a Color-Block Look
Mod and minimal, this gift wrapping technique relies on a variety of papers and ribbons in different intensities of the same color. Learn more about this look, plus get tips for nine other gift wrap options, below.
Make It Mod
Give your gifts a hip, retro vibe with inexpensive jewelry findings and vintage ornament cut-outs. Our free printable ornament templates and step-by-step instructions, below, show you how.

Wow With Washi Tape
You can actually skip the wrapping paper, ribbon and bows with this clever take. Just place gifts in plain white boxes, then decorate with patterned washi tape. Select tape in classic Christmas colors and patterns — or mix it up and opt for non-traditional, instead.
Spell Out Their Name
Repurposed game tiles and a bit of twine are all you need to craft playful gift tags they can later hang on the tree as an ornament. To create it, simply loop a long piece of twine then attach the tiles to the twine loop with glue, leaving enough room above the tiles to act as a hanger and a bit of twine below the letters for attaching a tassel. Make the tassel by cutting six small pieces of twine, gathering them together in the center and then knotting onto the bottom of the twine below the tiles.

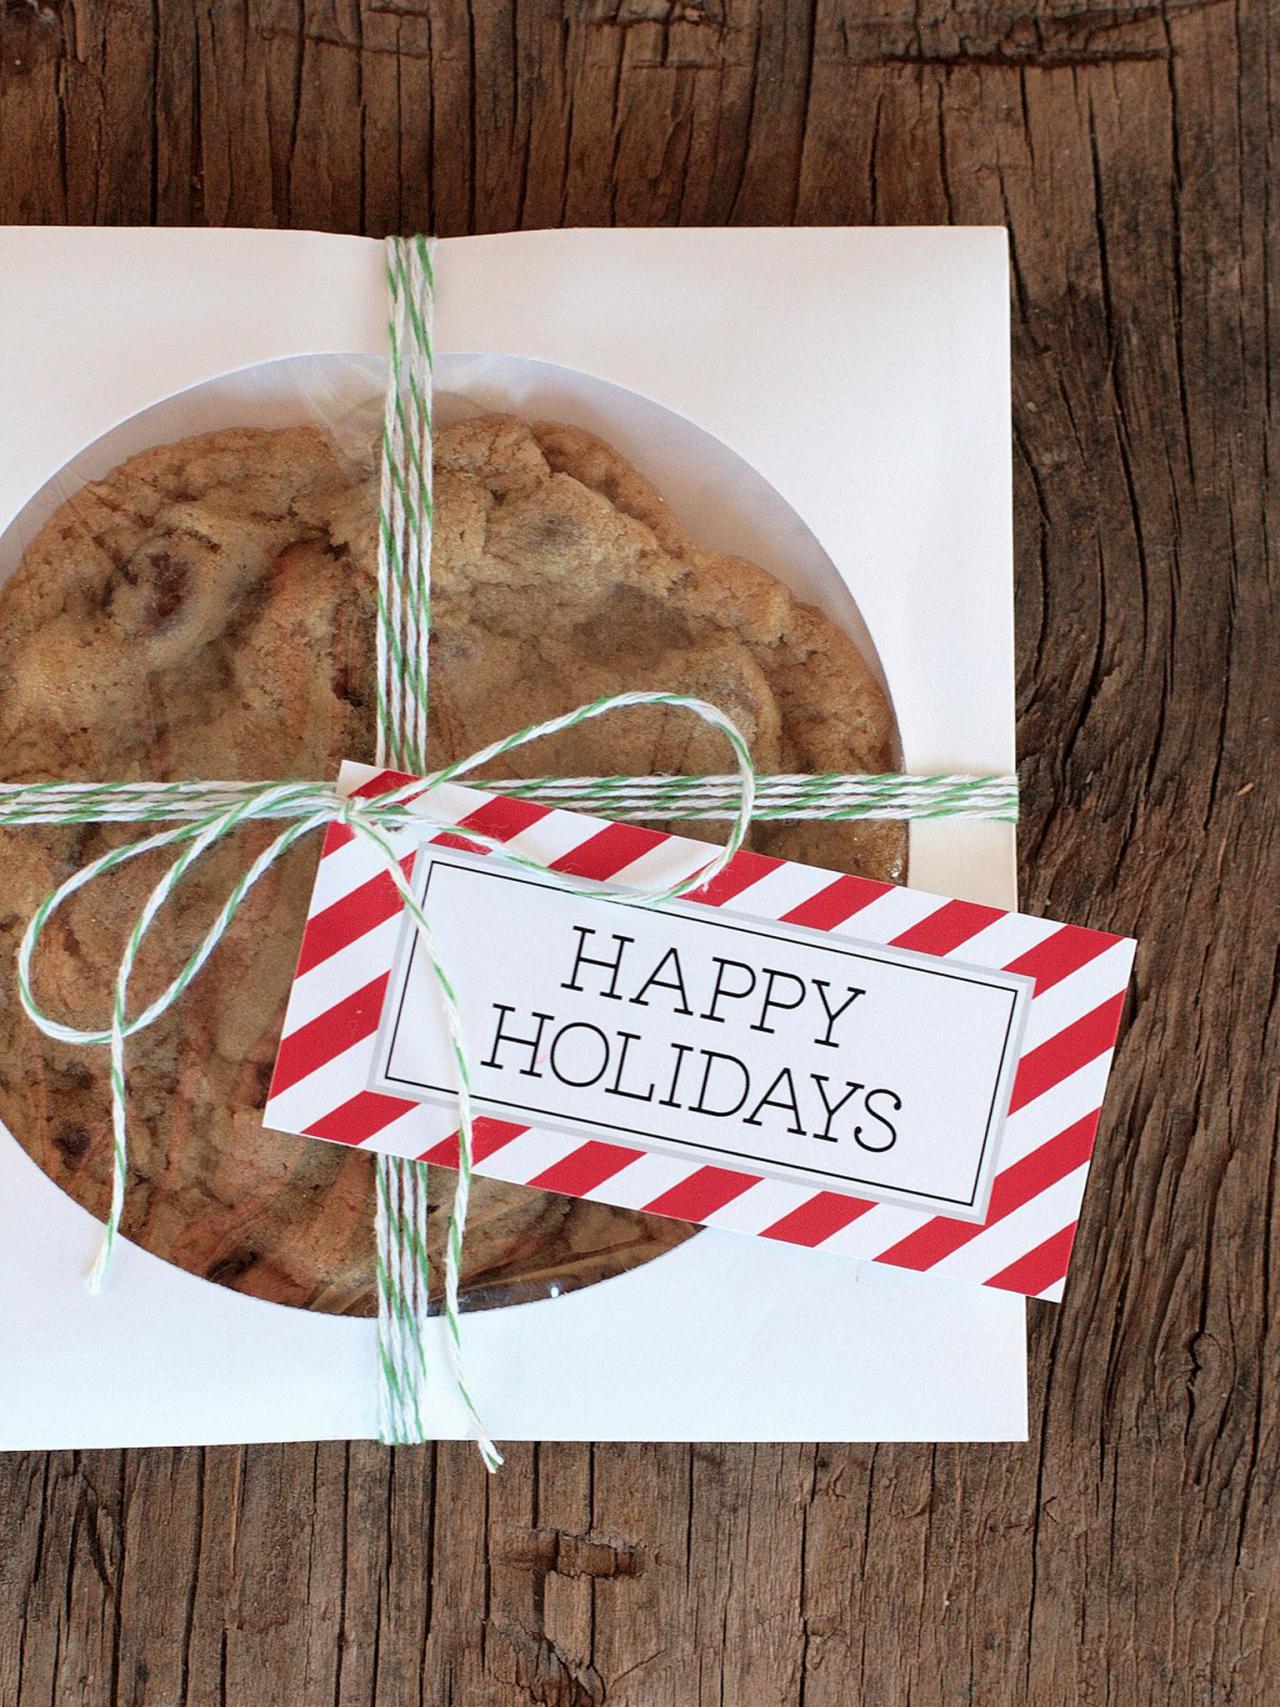
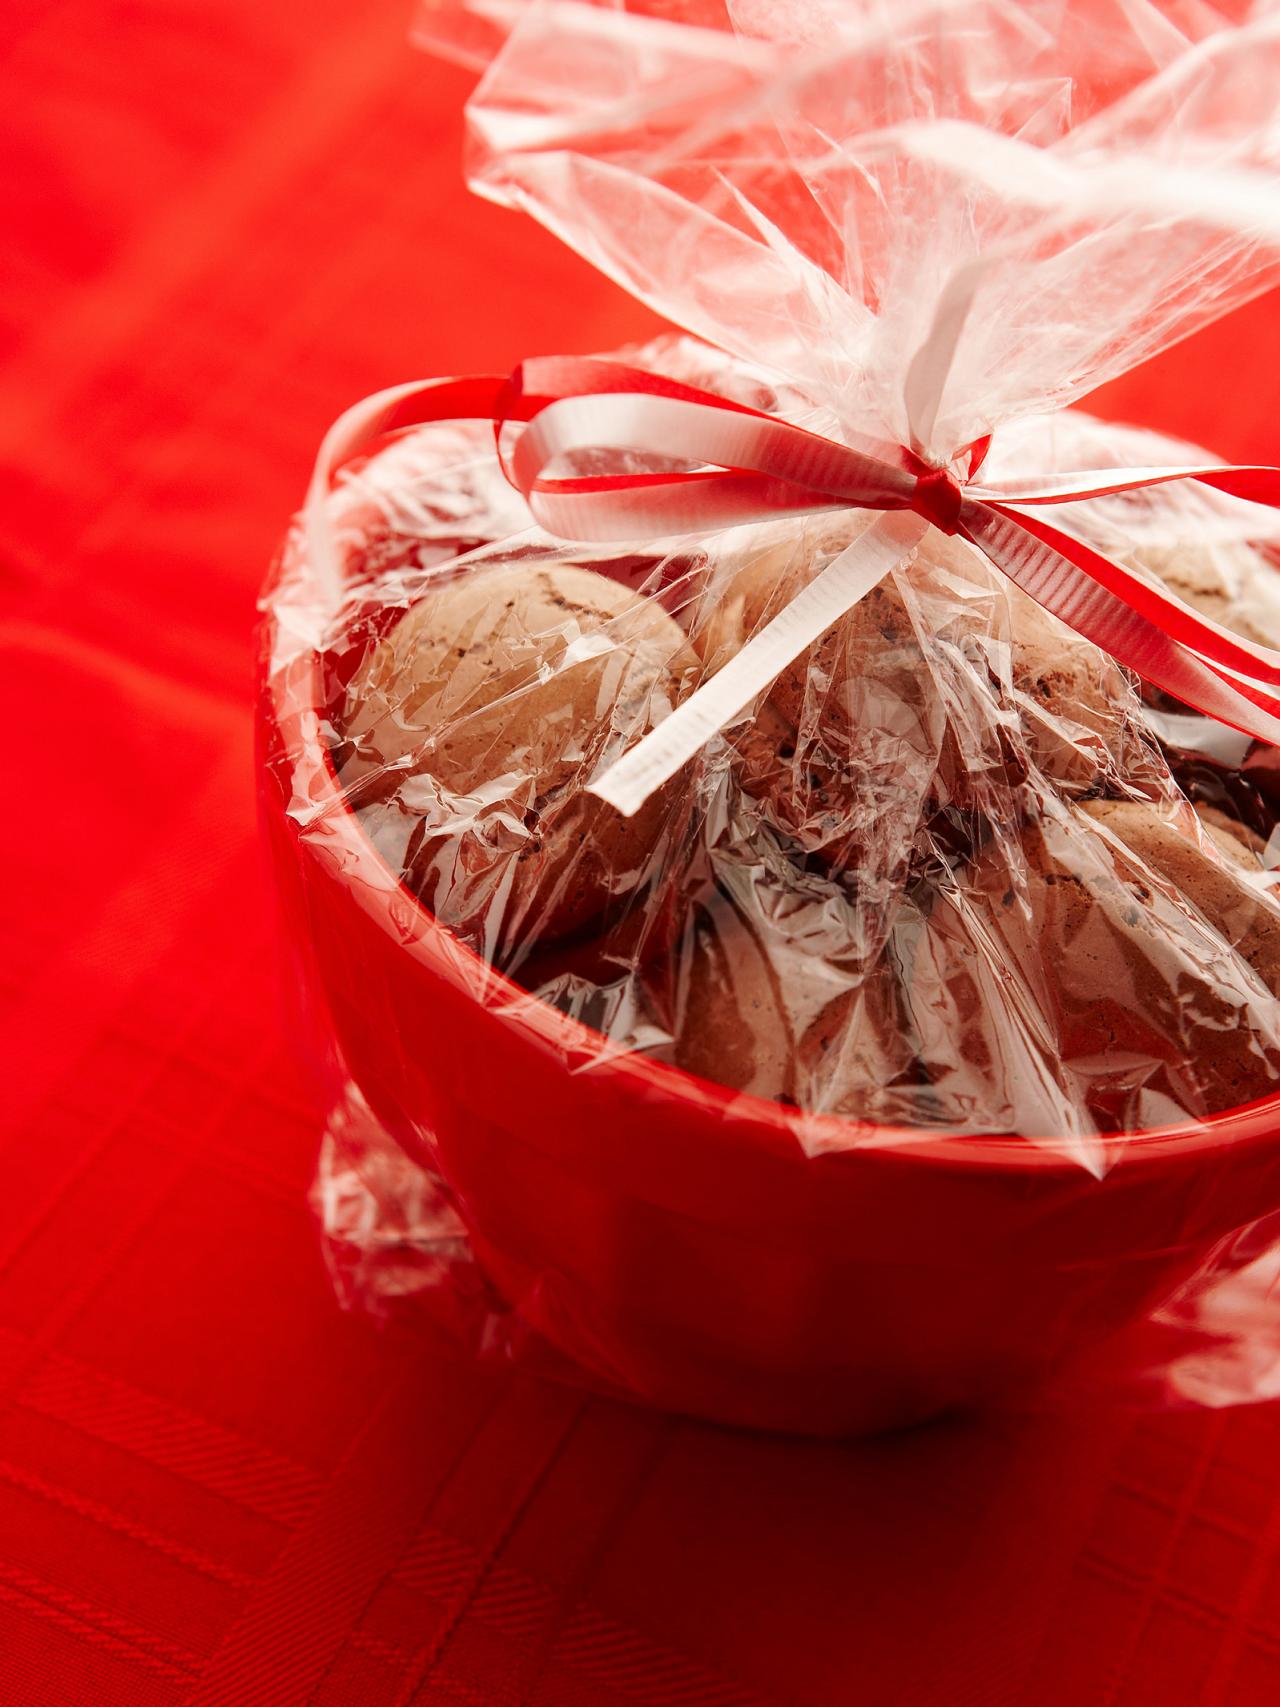
Cleverly Wrap Cookies To Go
Homemade holiday treats are even more thoughtful when they're packaged creatively. Entertaining expert Kim Stoegbauer cleverly wraps cookies in inexpensive paper CD sleeves; bundled up with baker's twine and a cute tag, they're the perfect way to surprise coworkers and neighbors with a sweet treat.
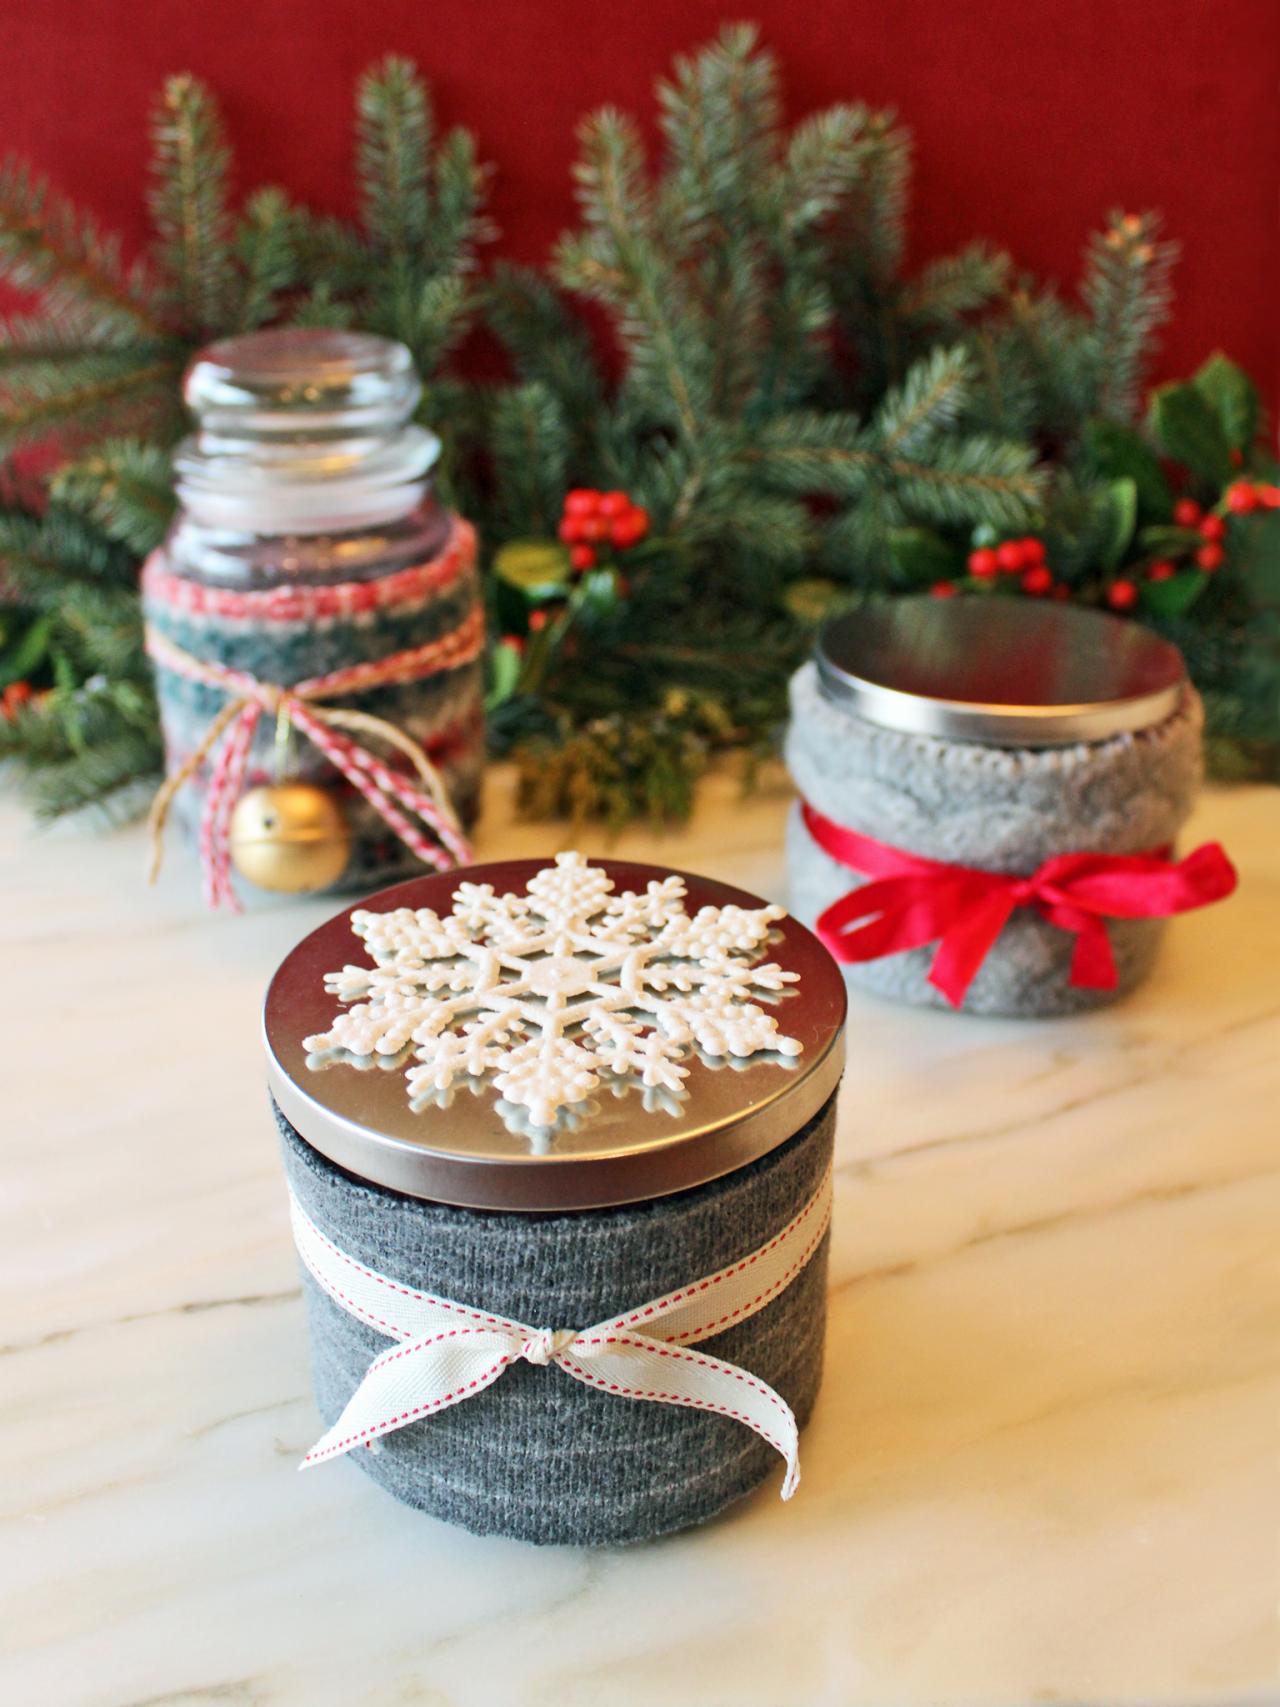
Repurpose an Old Sweater
Let's face it: We've all accidentally shrunk at least one wool or cashmere sweater. It's a painful learning experience: wool + hot water + agitation = a felted sweater that, on the downside, is now too small to wear. On the plus-side, felted fibers don't fray when cut. So, turn those felted gems into a clever way to package jar candles by sliding a candle into one of the sweater's felted sleeves then marking how much you need and cutting it off. Embellish with a coordinating ribbon, bell or ornament and your gift is complete.
Photo By: H. Camille Smith
Upcycle Jars
Everyone loves to receive homemade goodies during the holidays but creatively packaging pounds and pounds of treats can be a bit tricky — and expensive. To cut down on costs and give friends a container they can use again: give large glass jars you've saved throughout the year a good cleaning and paint the lids with chalkboard paint. Instead of a basic ribbon, wrap with twine or yarn then slide on a handmade pin or hair clip — so your gift is actually two gifts in one.
Photo By: H. Camille Smith
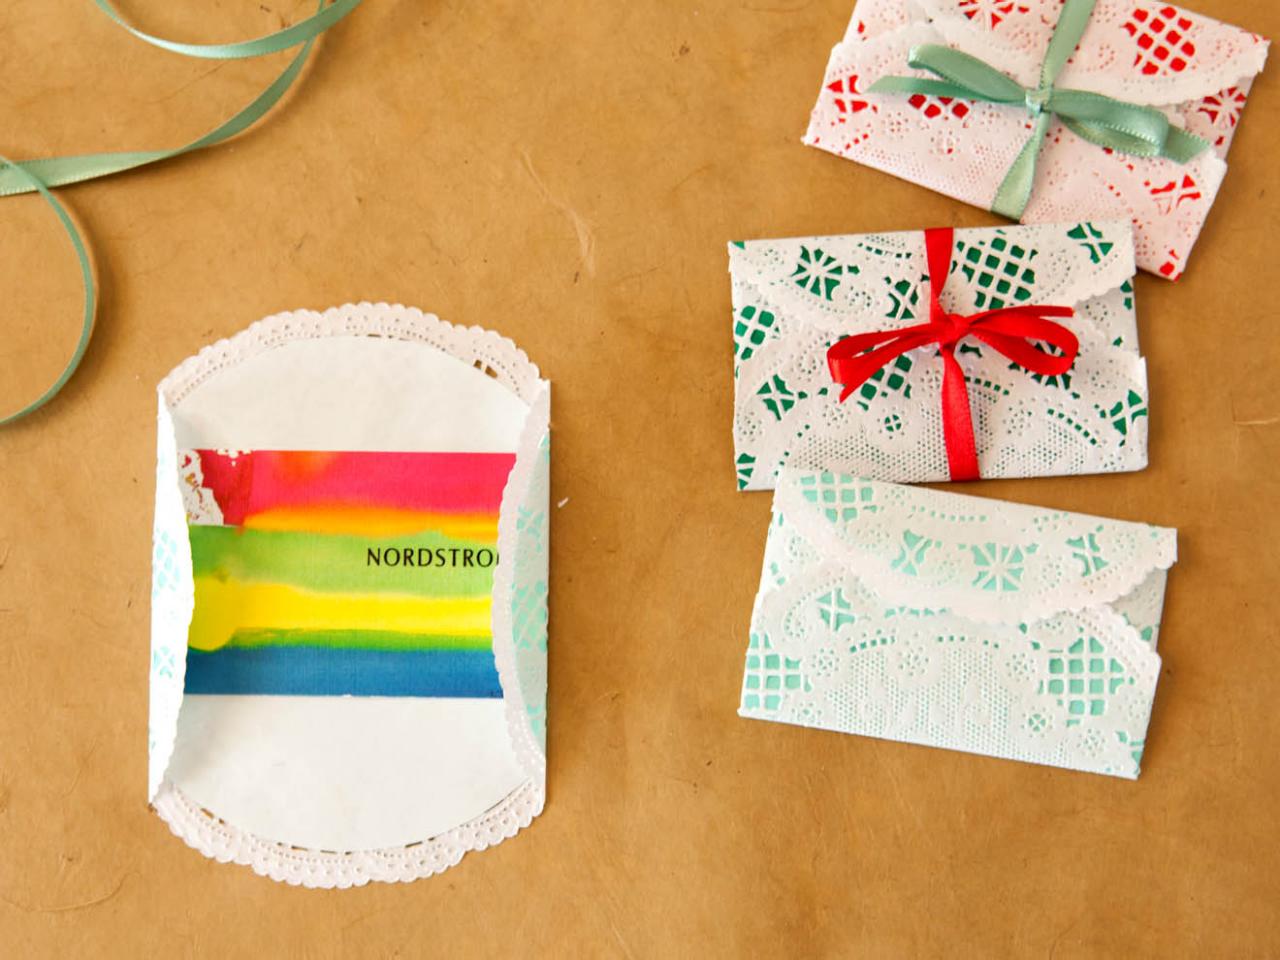
Get Creative With Paper Only
That's right, you can actually skip the ribbons and bows and rely on decorative paper cuts and origami-inspired folds to make your gifts stand out from the pack. Our ideas and tips, below, will have you wrapping gifts like a pro in no time.
Photo By: Sam Henderson
Top It With a Paint Chip Gift Tag
Put leftover paint chips to good use as cute and colorful gift tags. Use a Christmas-shaped die or punch to cut the paint chip into a shape you like, then add the recipient's name with a stamp or permanent marker.
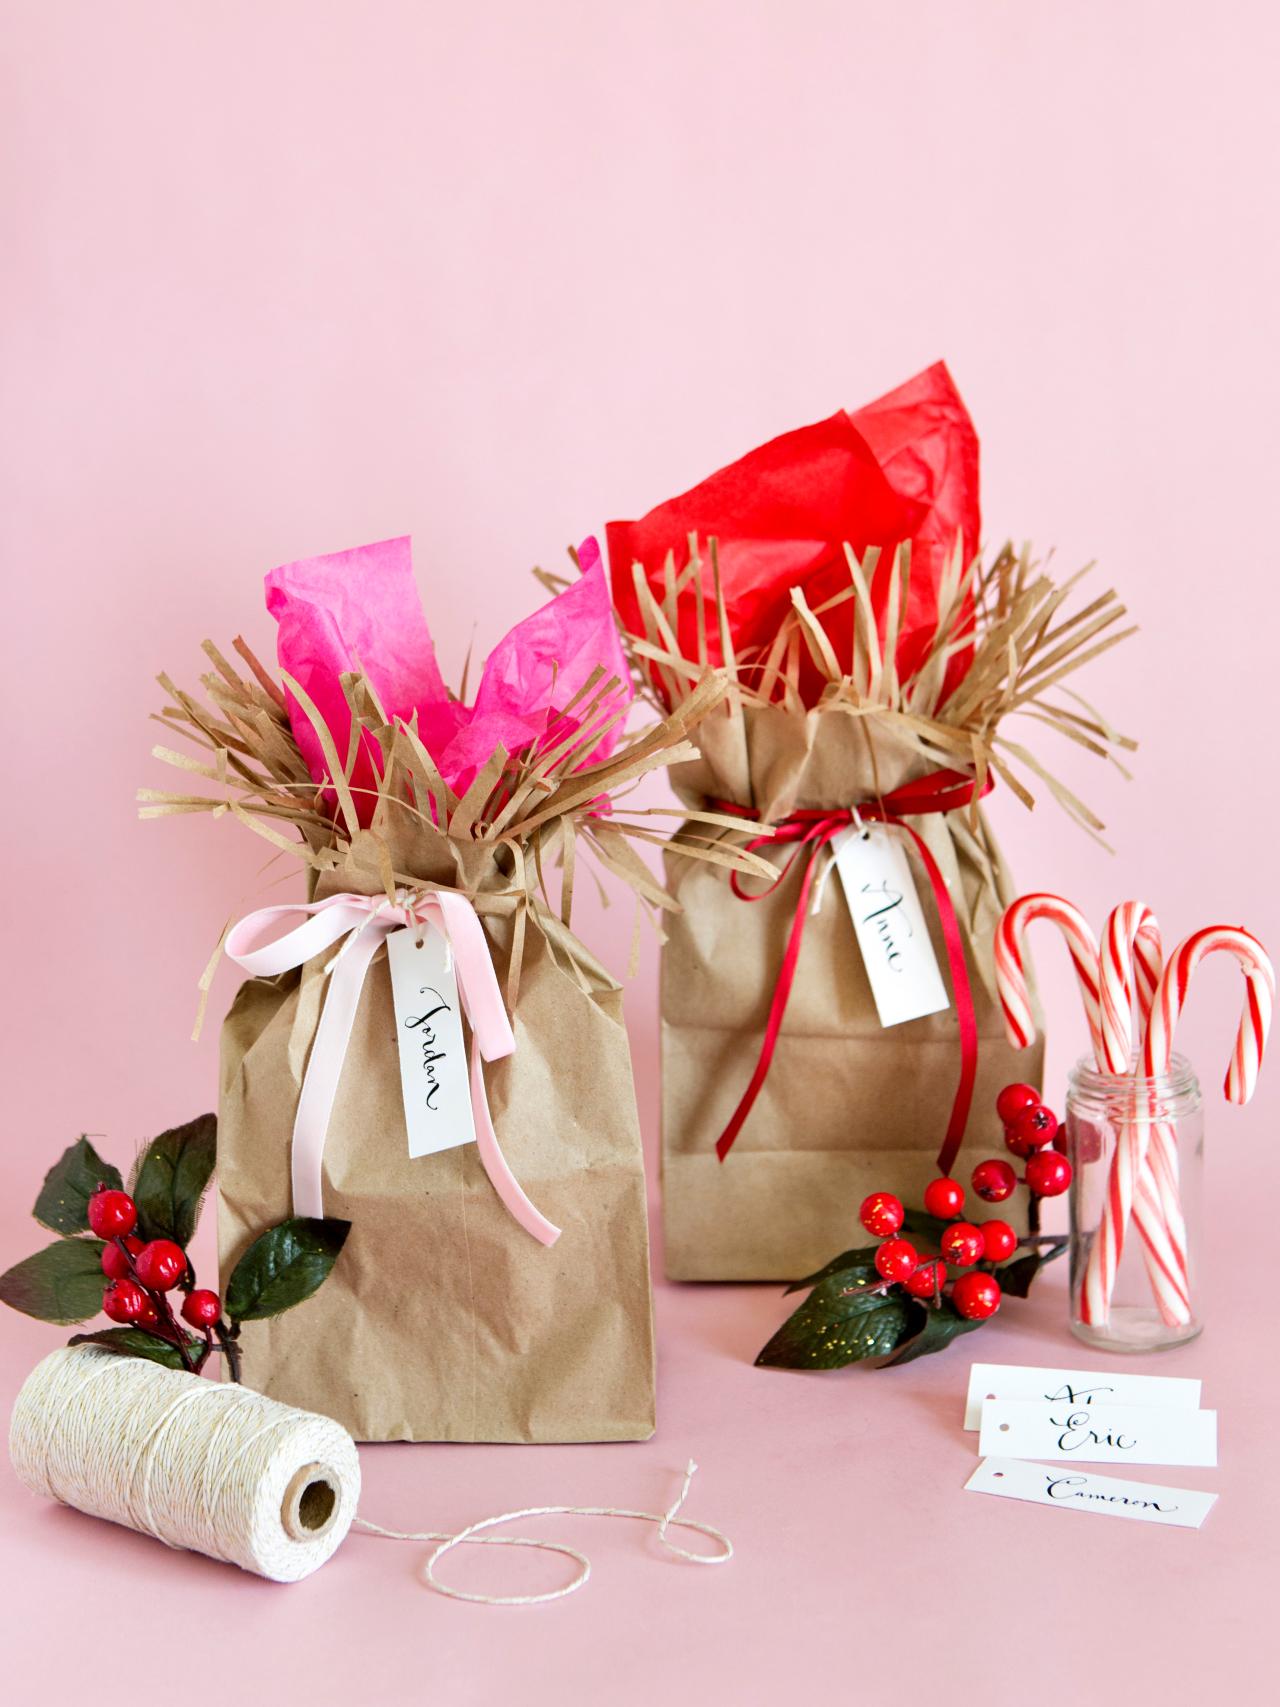
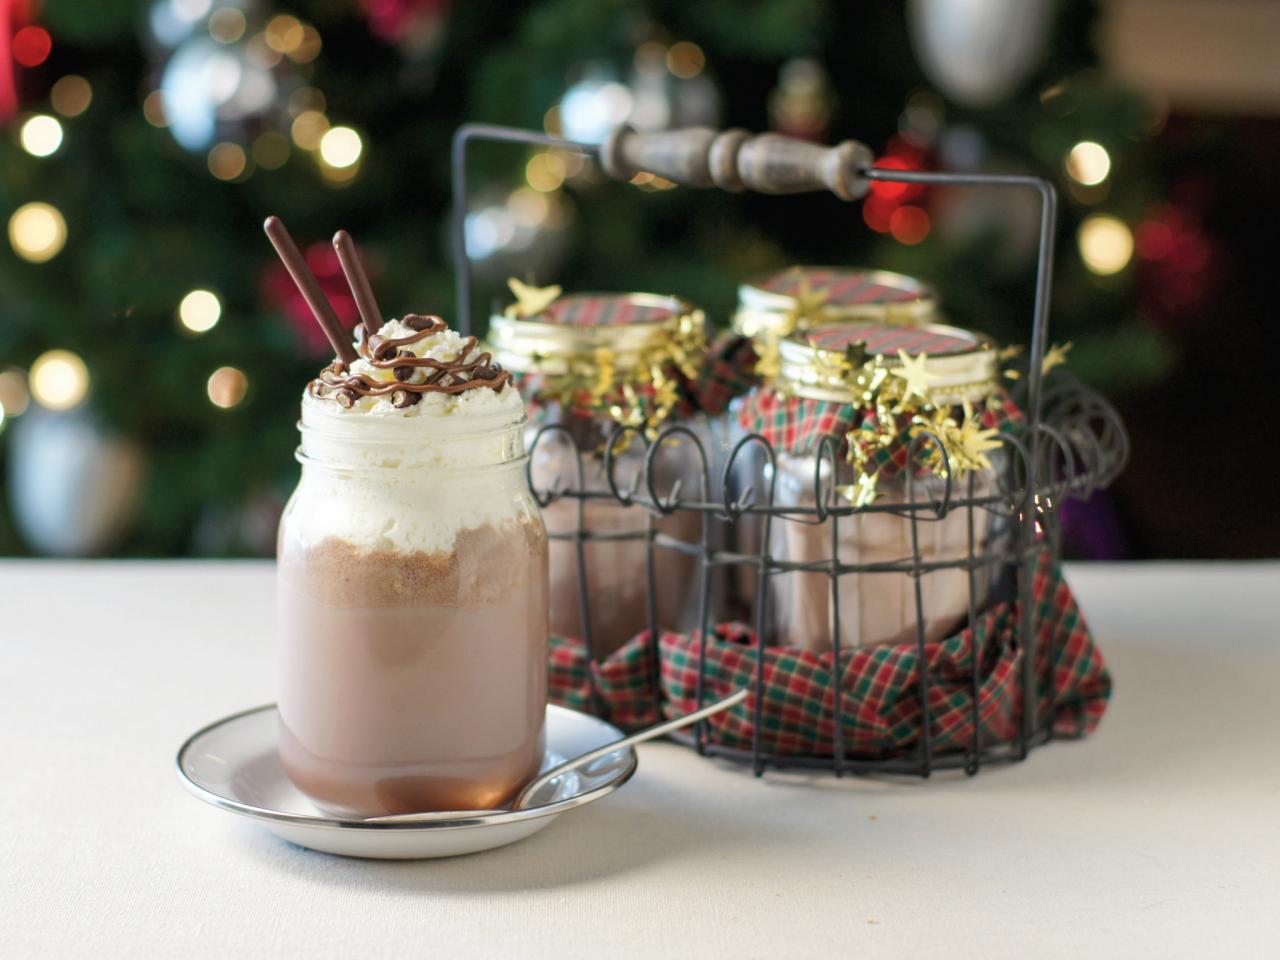
Gift a Treat-Filled Jar
Hot cocoa warms even the chilliest of days. Share the warmth this holiday season by packaging ingredients for delectable hazelnut hot cocoa into a canning jar and handing them out as sweet gifts. The recipients can even repurpose the jar as an oversized mug to enjoy their seasonal sip. Get the recipe and packaging instructions, below.
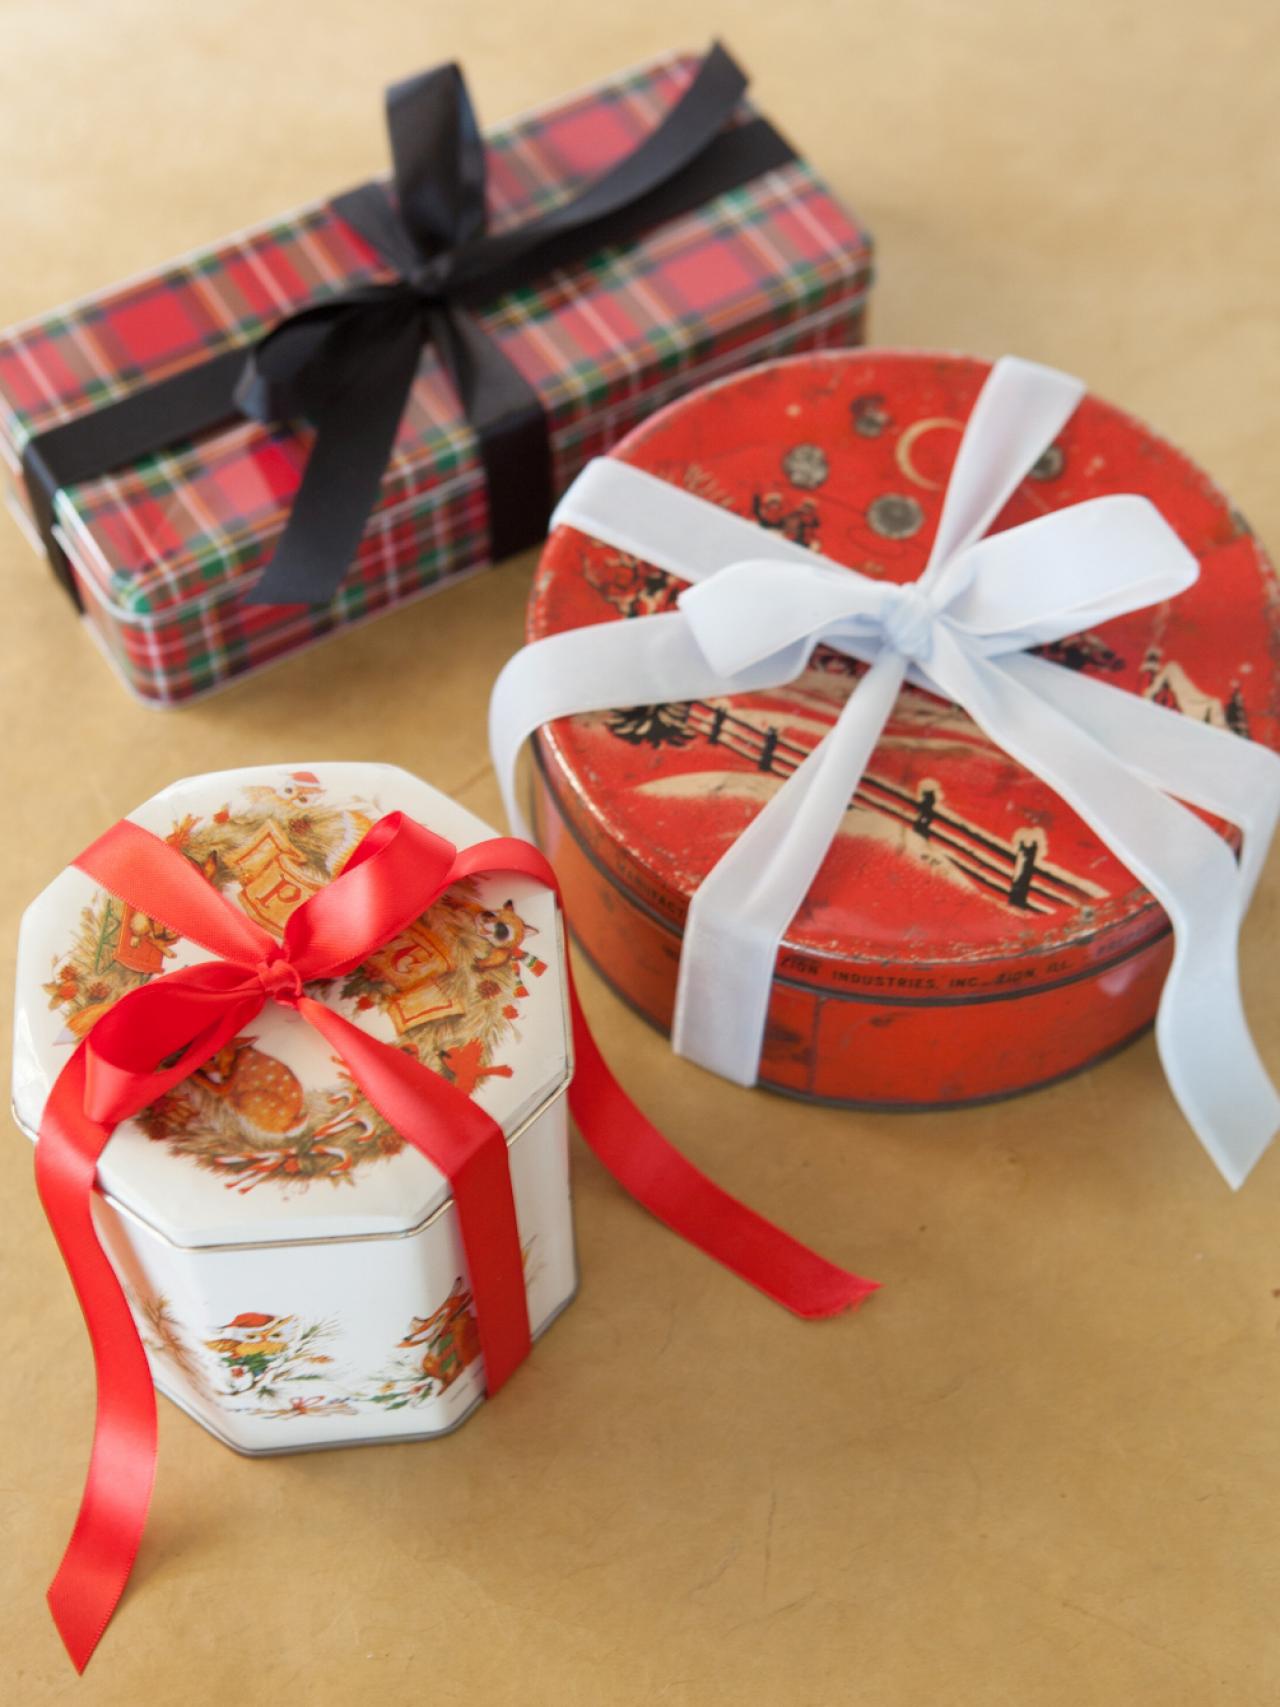
Use Vintage Containers
This vintage copper bundt pan is proof that practical can be pretty. Too pretty, in fact, to hide away in a box. Filled with spices, tea towels, wooden spoons and other kitchen essentials, this collection will put a smile on any foodie's face. Bonus: The beautiful bundt pan is actually part of the gift, so no boxes, bags or wrap to dispose of later. Browse 14 more vintage-inspired gift ideas, below.
Give New Life to an Old Shirt
Scour your closet (or local thrift store) for old clothing items that can be upcycled into Christmasy covers for lidded boxes. To create them, just use a glue stick to secure the fabric to the box's lid, tightly folding in the corners and gluing the ends under the lid's rim. Finish by attaching satin ribbon and a bit of faux greenery for a beautiful box you can use year after year.
Photo By: Cassidy Garcia; Styling by H. Camille Smith
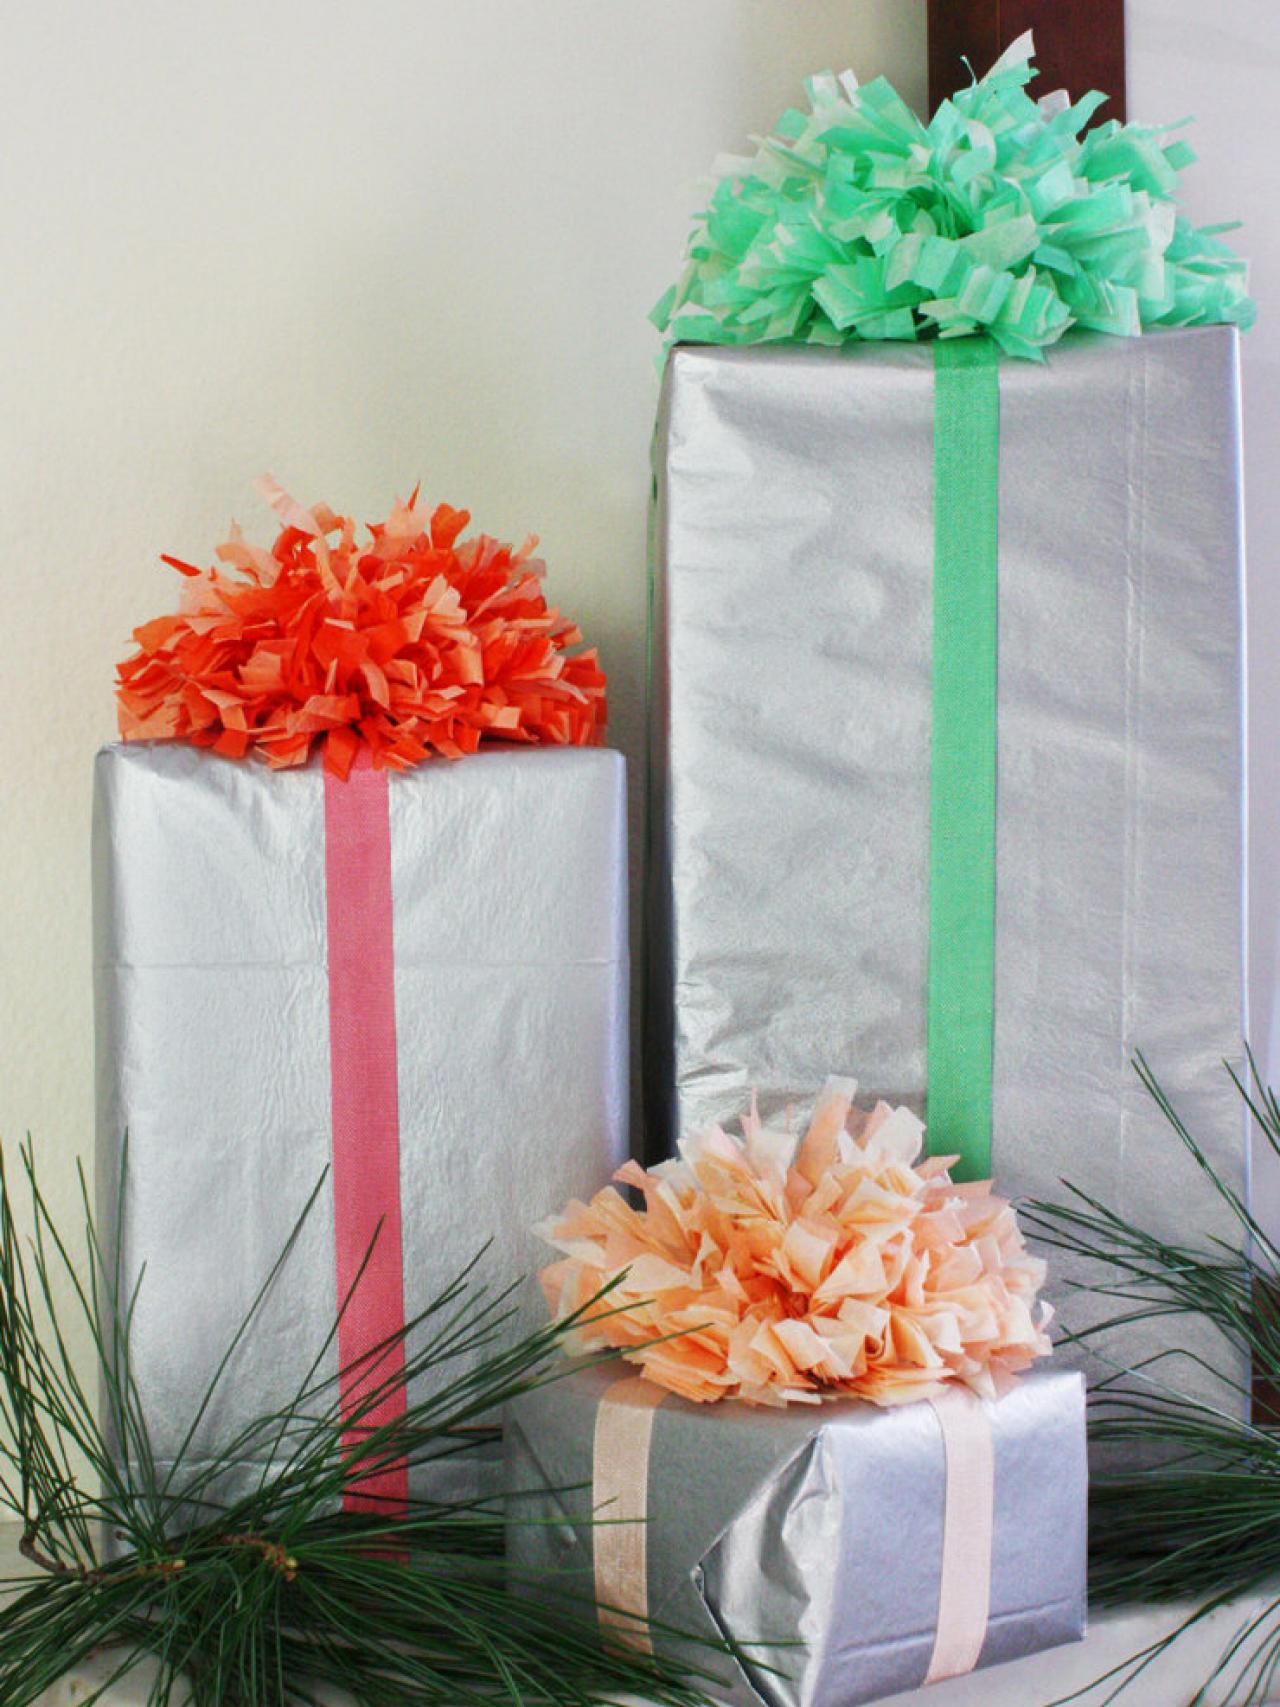
Make It Fuzzy With Yarn
This sweet gift wrap comes together in a snap. Just place gift in a pretty box then top it with a paper doily held in place with double-sided tape or glue dots. To make the pom-pom, wrap several loops of yarn around your fingers, knot the loops in the middle, then trim the knotted yarn into a rounded pom-pom shape.
Photo By: H. Camille Smith
Use One of Our Free Printables
Both kids and nostalgic adults will love this cute graphic tag featuring Santa's favorite reindeer. Wrap gifts with red ribbon and top with a brown yarn pom-pom for a consistent color scheme. Check out our other free printables, below.
©ten22 studio | Rennai Hoefer
Stick With a Theme
Give the gift wrap as part of the gift! Tie a vintage Christmas cookie cutter using gold ribbon to the gift box. Stick with the theme by gifting a cookie recipe book, festive sprinkles and a rolling pin.
Add Some Seasonal Sparkle
After all, what are the holidays without a little sparkle? Top craft-paper-wrapped gifts with a glittered paper doily, self-adhesive rhinestones, metallic rick-rack and a glittering mini pinecone.
Photo By: H. Camille Smith
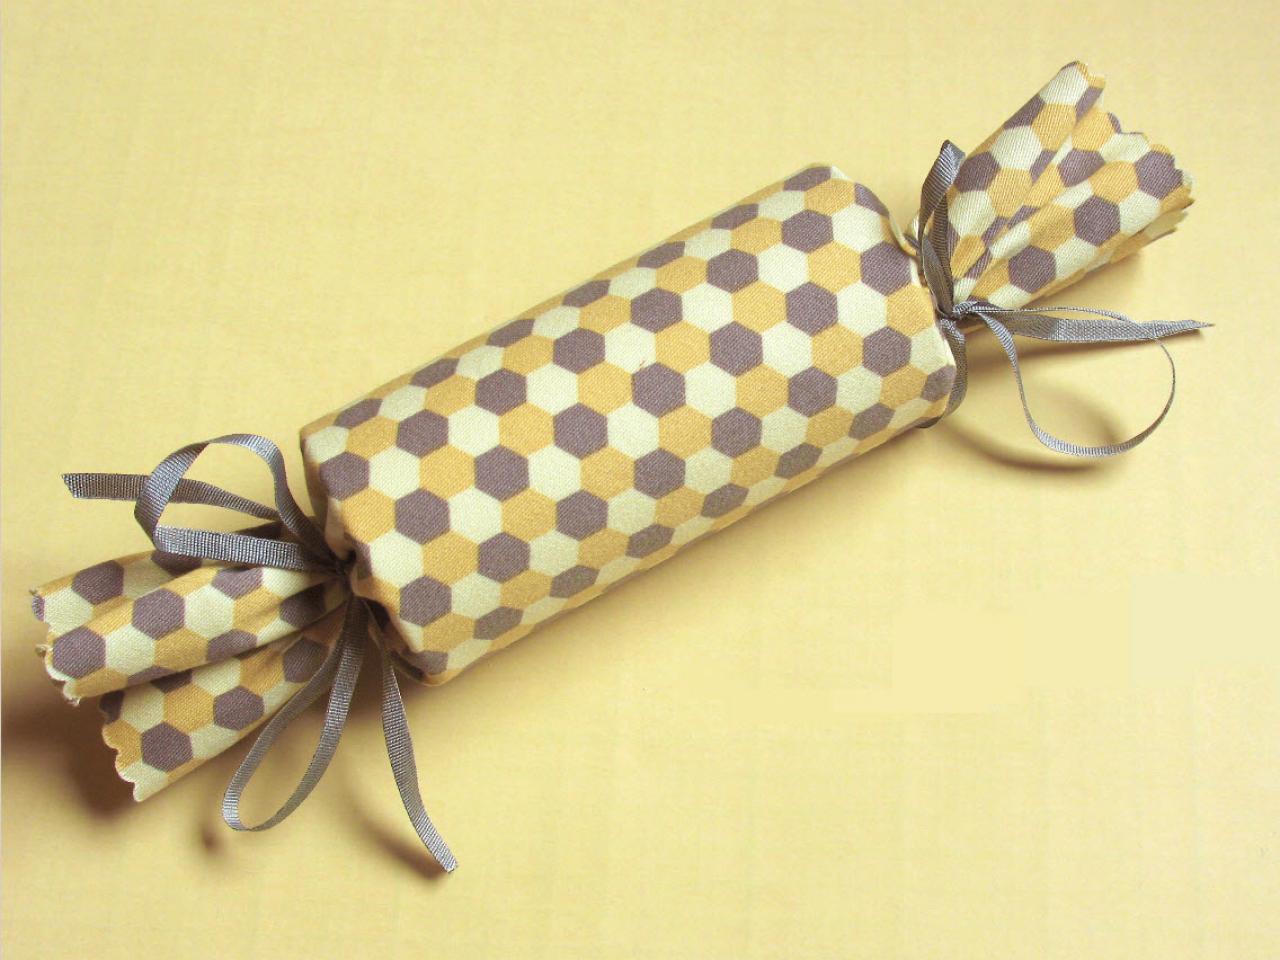
Wrap It In Fabric
Cover an inexpensive cardboard mailing tube in trendy, graphic fabric for an eye-catching holiday gift wrap idea. Best of all, the fabric-covered container can be used for year-round storage.
Photo By: H. Camille Smith
Use Leftover Fabric as Gift Tags
When wrapping a gift for someone extra special, don't stop at just tying on a bow — add a topper. Good choices are candy canes, fresh greenery or an ornament — like this easy-to-make fabric ornament that covers one of our free ornament printables in a small bit of leftover fabric.
Photo By: H. Camille Smith
Don't Forget Our Free Gift Tags
Adding a graphic finishing touch to your gifts is easy. Just print our free gift tag onto white card stock, then cut it out with scissors or a tag-shaped cutter. Leave the tags as is, or add glue to each of the ornaments and dust them with glitter for a bit of glitz.
©ten22 studio | Rennai Hoefer
Opt for an Outdoorsy Look
Trendy menswear-inspired red flannel ribbon and a few fresh spigs of greenery give this gift a wintry, woodsy feel. To make the rustic topper, cut a small and medium circle out of upholstery webbing and pull on the outer fibers to create a frayed edge. Use an upholstery needle to stitch the two layers together then sew on a single glass bead. Glue an alligator clip to the back so the topper can be easily clipped onto the gift then later reused by the recipient as a hair or scarf clip.
Photo By: H. Camille Smith
Wrap It in Confetti
Create a cool effect by floating metallic confetti between two layers of wrapping paper. First, wrap the gift in solid white paper. Next, wrap the gift in a layer of clear cellophane leaving one side open. Put confetti between the cellophane and wrapping paper layers. Close the open side with tape. You can try this technique with a variety of colors for any special occasion.
Delight Your Favorite Globetrotter
Maps continue to be a trendy decorating theme and, better still, many are large enough to wrap several small gifts or one large one. To make the wrap more personal, select a map that shows the recipient's birthplace or a favorite travel destination.
Paint On the Gift Tag
Though no longer the crafting new kid on the block, chalkboard paint remains popular, especially when used in a clever way, like this chalkboard gift tag which is painted directly onto the craft paper wrap. Thanks to craft paper's thickness, you can paint it and the wrinkles will flatten out as the paint dries.
Photo By: H. Camille Smith
Use Flowing Silk Ribbons
The trick to making your ribbons look professional is double stick tape. After you tie a bow around your gift with wide satin ribbon, use double-stick tape to attach the long ends of the ribbon to the box for a flowing look. The ribbon will look like it’s permanently flowing instead of falling flat.