


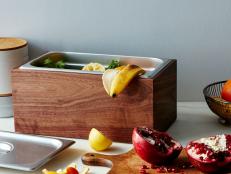
How to Make an Attractive Compost Bin for Your Kitchen
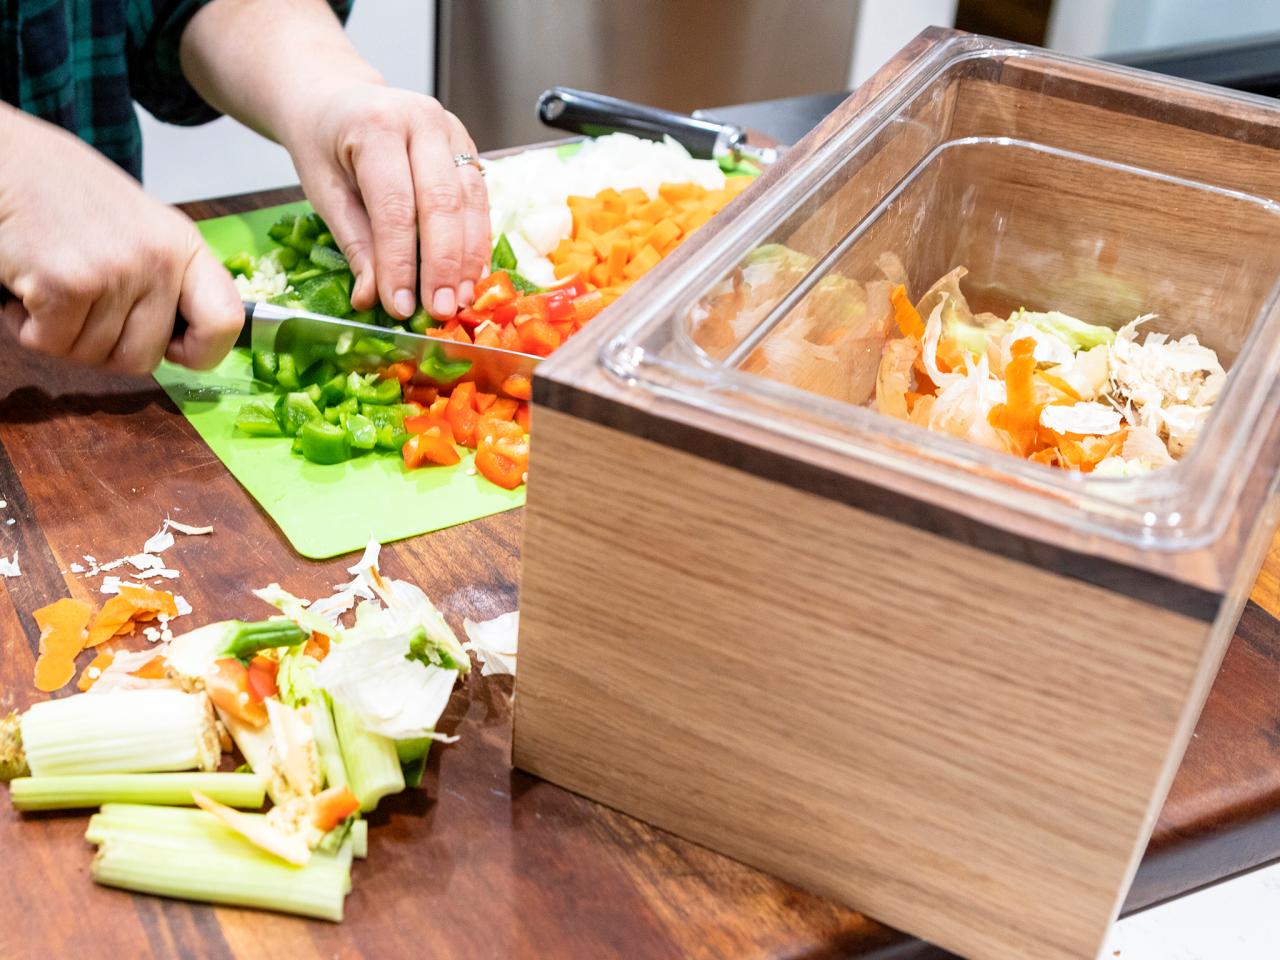
Turn the kitchen scrap bin into a conversation piece instead of an eyesore. A simple wood box with a removable (and dishwasher safe) insert makes it easy to compost.

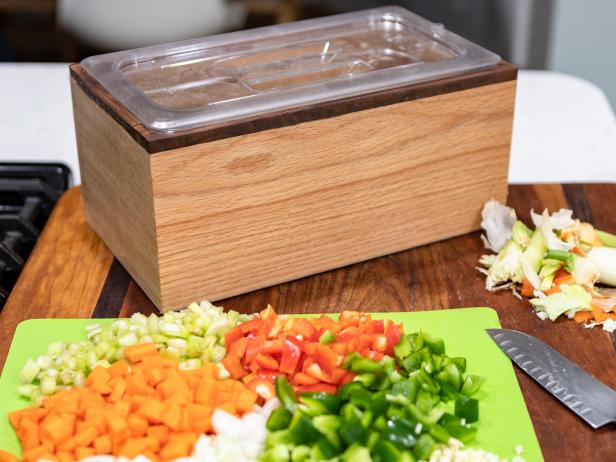
If you live with a gardener or are one yourself, odds are good that you make the effort to compost your kitchen scraps. And while composting is important, and great for the garden, after a day or two, it gets hard to explain to your guests what that bucket of eggshells and banana peels is doing on your countertop. Here’s a more elegant solution to your basic compost container.
Tools and Materials
- (1) 1x6 x 6' piece of hardwood
- (1) 1x1 x 36" piece of flat trim or hardwood scrap
- (1) 14" x 14" or larger scrap of 1/4" plywood
- (1) bottle of wood glue
- (1) pkg of 1/8" clear rubber feet
- (1) roll of masking tape
- (1) 1/3 size restaurant pan with lid
- router with 1/4 straight bit and flush trim bit
- table saw
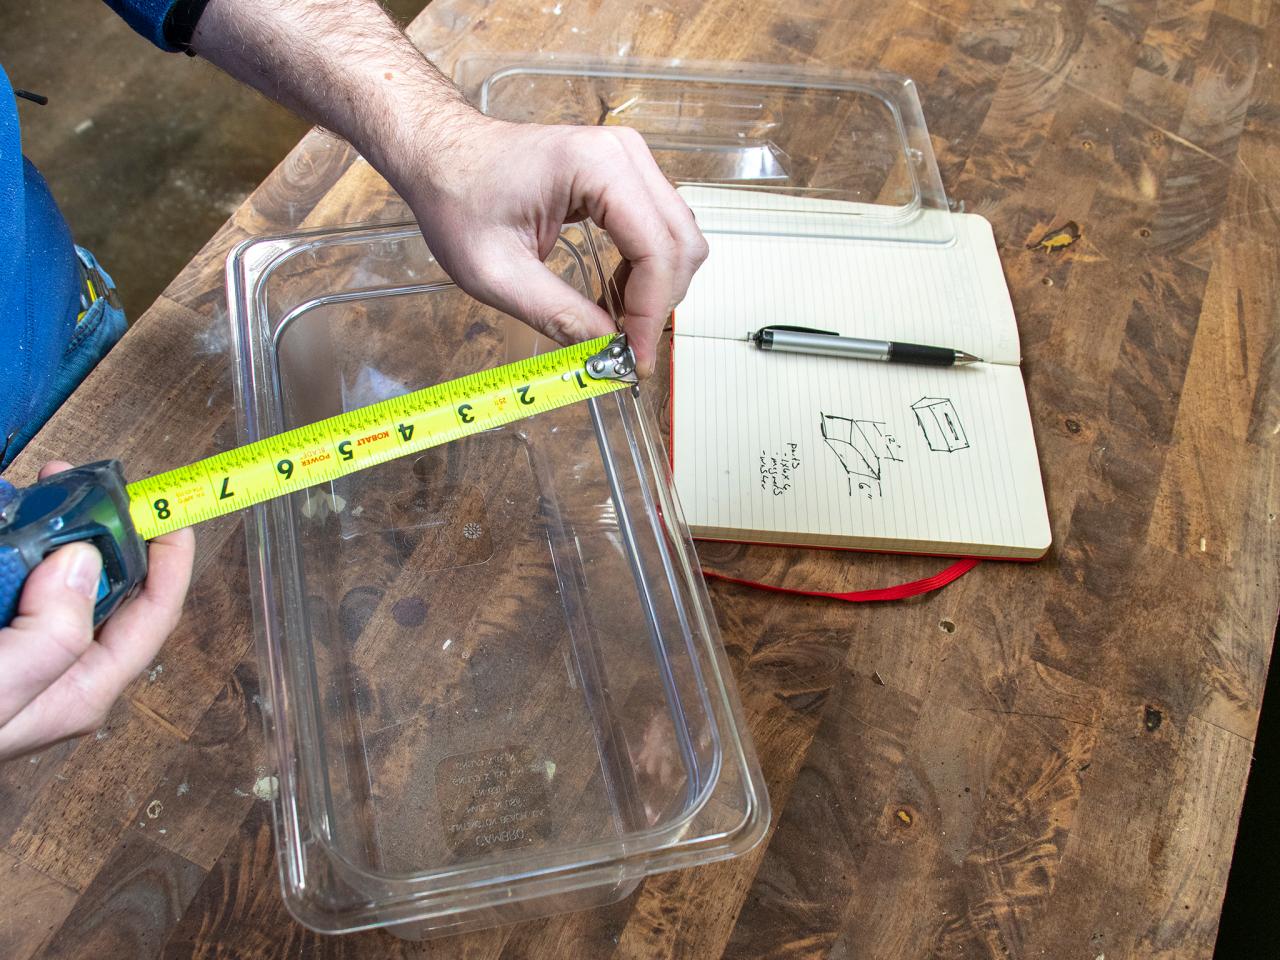
A Restaurant Pan is the Perfect Size

A restaurant pan has a lid with a handle and a decent sized lip that will sit nicely in your new handmade box. A 1/3 sized pan is great for larger families while the 1/6 size is good for smaller households. We’re using a 1/3 size in clear, but you can also purchase them in stainless steel if you want to spend a little more money. Having a clear lid lets you see when it’s getting full.
Step 1: Cut Sides and Bottom
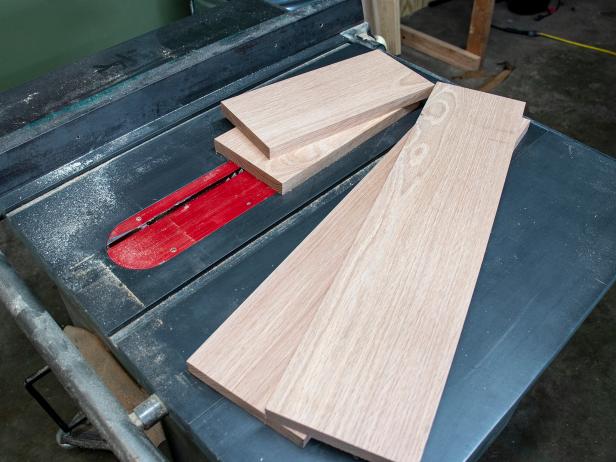
Since we’re going to be making miter joints, you’ll want to cut your sides slightly longer than needed. Cut the two long sides to 14” and the two short sides to 8”. This gives you a little more material at the edges to make cleaner safer cuts, especially if you’re using a table saw. Take this opportunity while your saw is set to 90 degrees to cut the plywood bottom to 6-1/2" x 12-1/2".
Step 2: Perfect Miter Cuts on a Table Saw
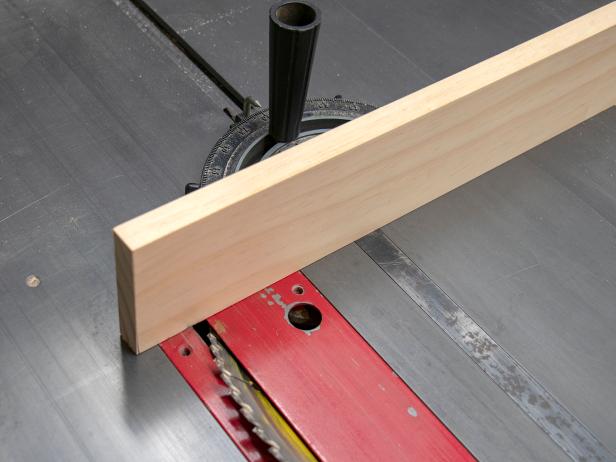
Making perfect miter cuts on the table saw is easy with the right preparation. Using a scrap 1x3 attached to your table saw’s miter gauge, you can make accurate, repeatable cuts. Making sure that no screws will contact the blade from the miter saw tracks, attach your 1x3 to the miter gauge. Make sure that your 1x6 is 90 degrees to the table and relatively flat.
Step 3: Dial in Blade Angle
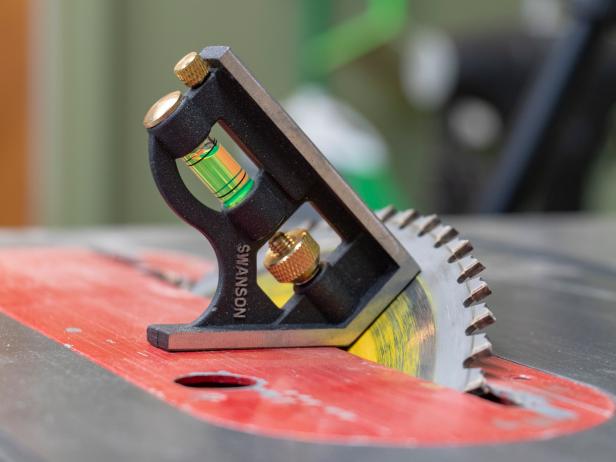

The only way to get a perfect 45-degree cut is to make sure your blade is properly adjusted. Use a combination square with the ruler removed to ensure that your blade is confidently resting at 45 degrees to the saw’s table. You can also use a digital gauge to adjust your blade to a perfect 45. They’re relatively inexpensive and work well on a wide variety of shop tools.
Step 4: Make a Cut and Draw a Line
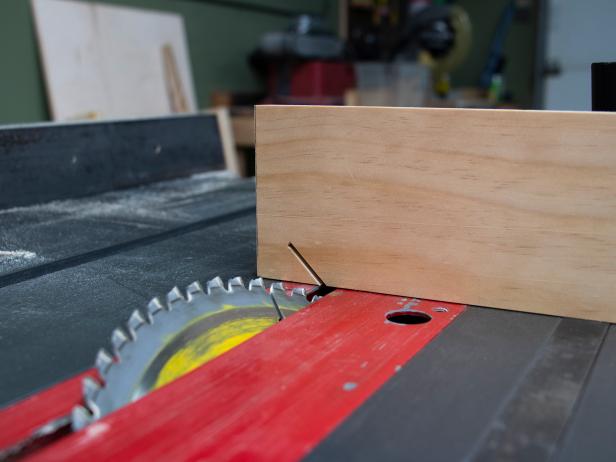
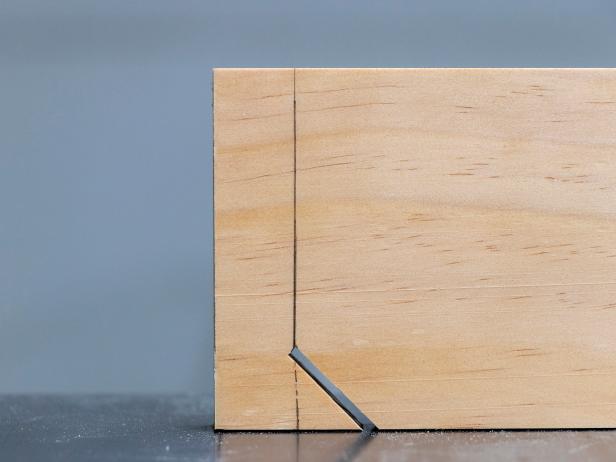
Now that you’ve got your miter fence installed and your blade angle adjusted, raise your saw’s blade to a comfortable height, make a 45-degree cut into your fence. Do this before you start running stock through the saw so it will pass freely over the blade. Once you’ve made a cut, use your combination square to draw a line straight up through the peak of the cut. This will act as a reference point for all of your cuts.
Step 5: Measure Cuts and Align Your Lines
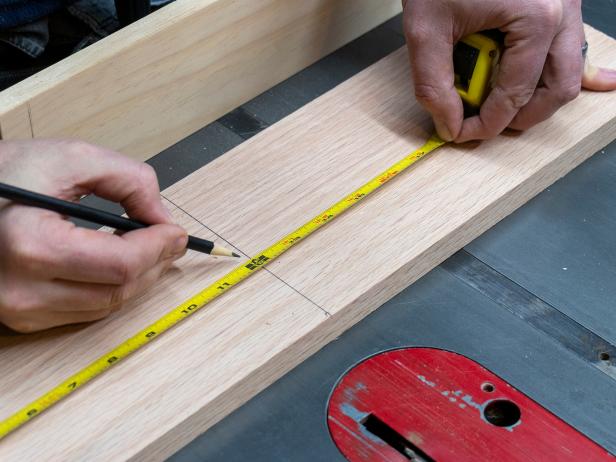
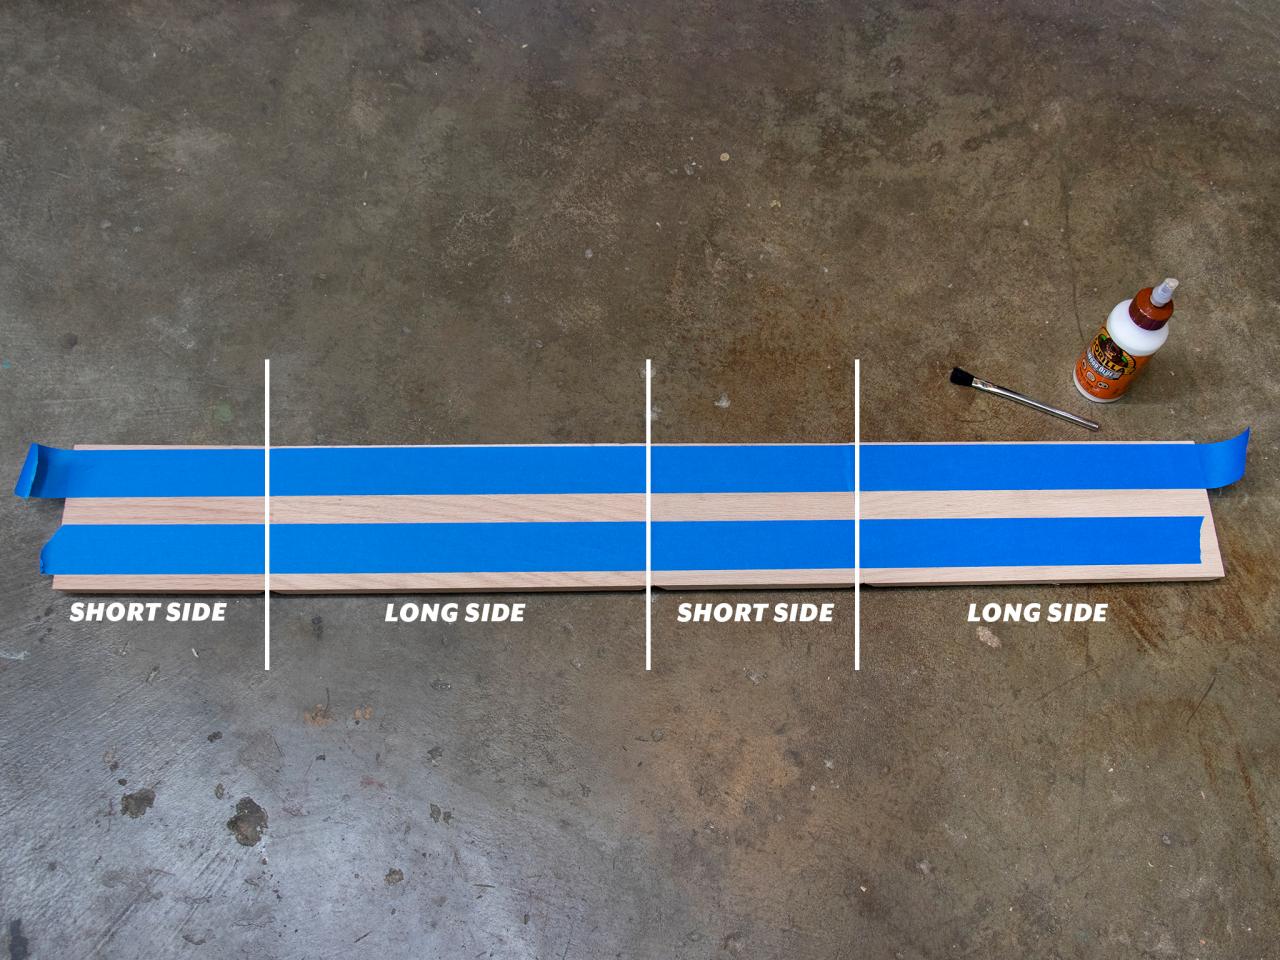
Now you can start making miter cuts. Cut one end off of your board, then measure from the peak of your cut down the length of the board. For the long sides measure 13-1/4” in length and 7-1/2” for the short sides. Draw a line across your board and, when you’re ready, align it with the one you drew on your miter gauge and make your cut. Continue that process until you’ve mitered both ends of all four boards.
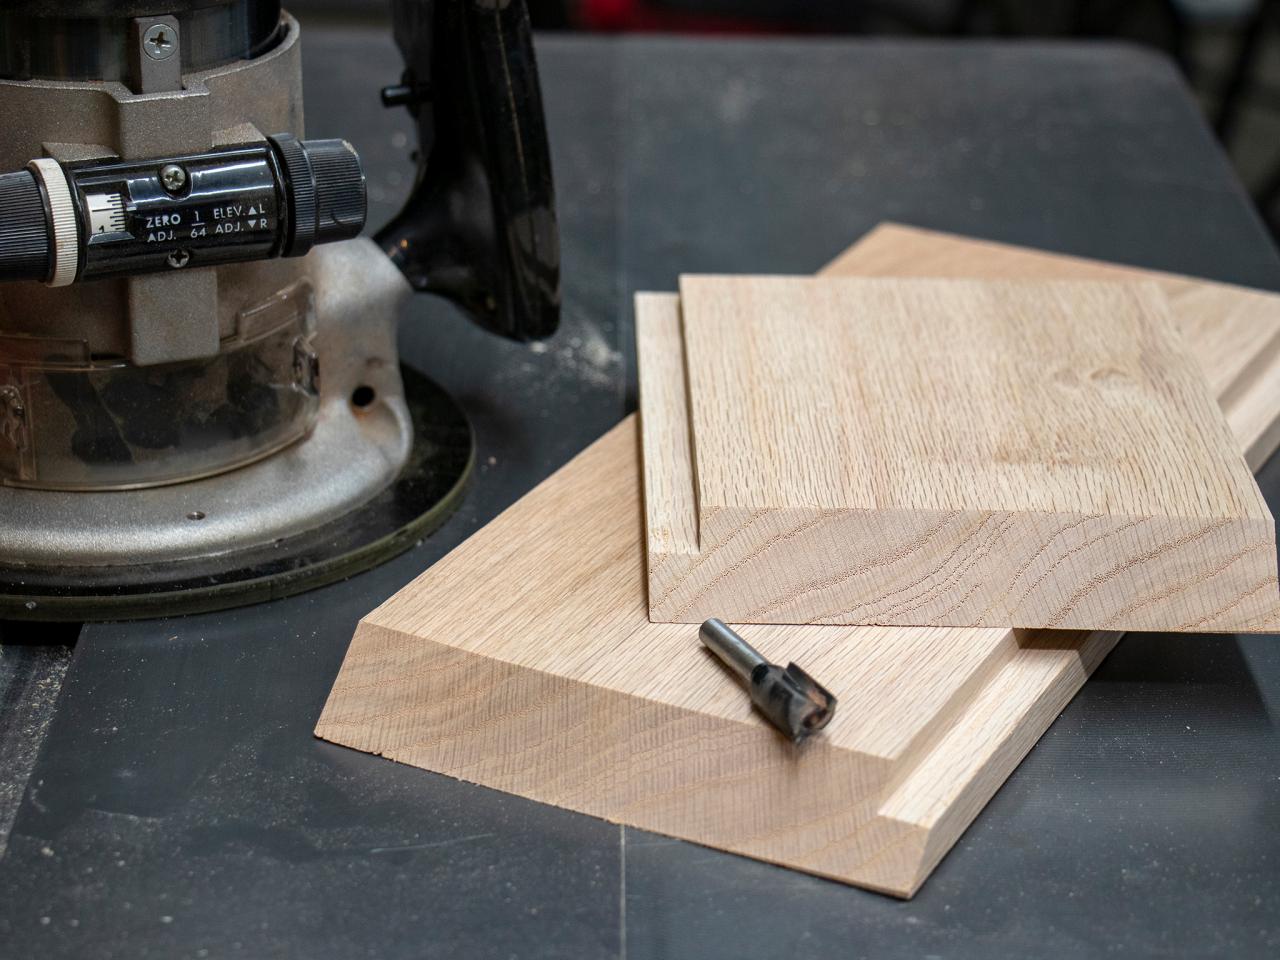
Step 6: Add a Rabbet for the Bottom

It’s entirely acceptable to glue the bottom piece directly to the bottom of your box, but it’s going to be visible. If you have a router, you can quickly add a rabbet to the bottom of the box and give it a cleaner look. Lay out your sides so that you’re pleased with the direction of the grain and set a 1/4” straight bit to 1/4” deep. Next, simply run the router down the bottom edge of each board. Now all four sides have a rabbet that will meet up neatly in the corners.
Step 7: Fold Box Together
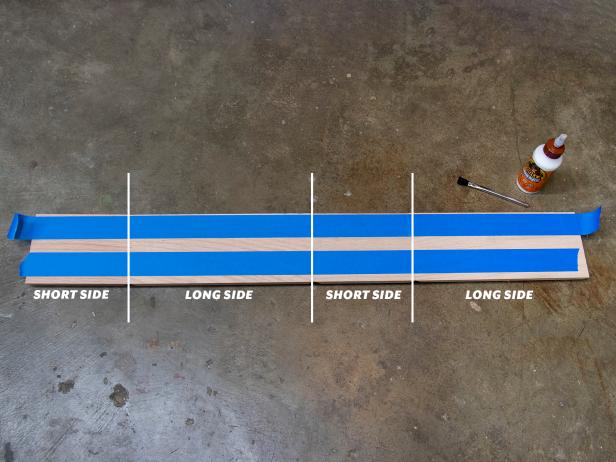
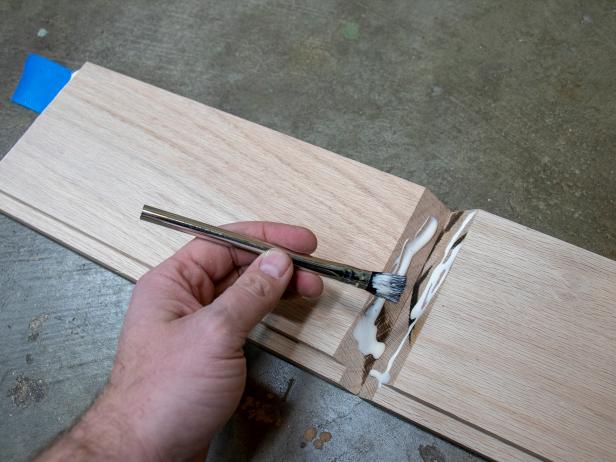
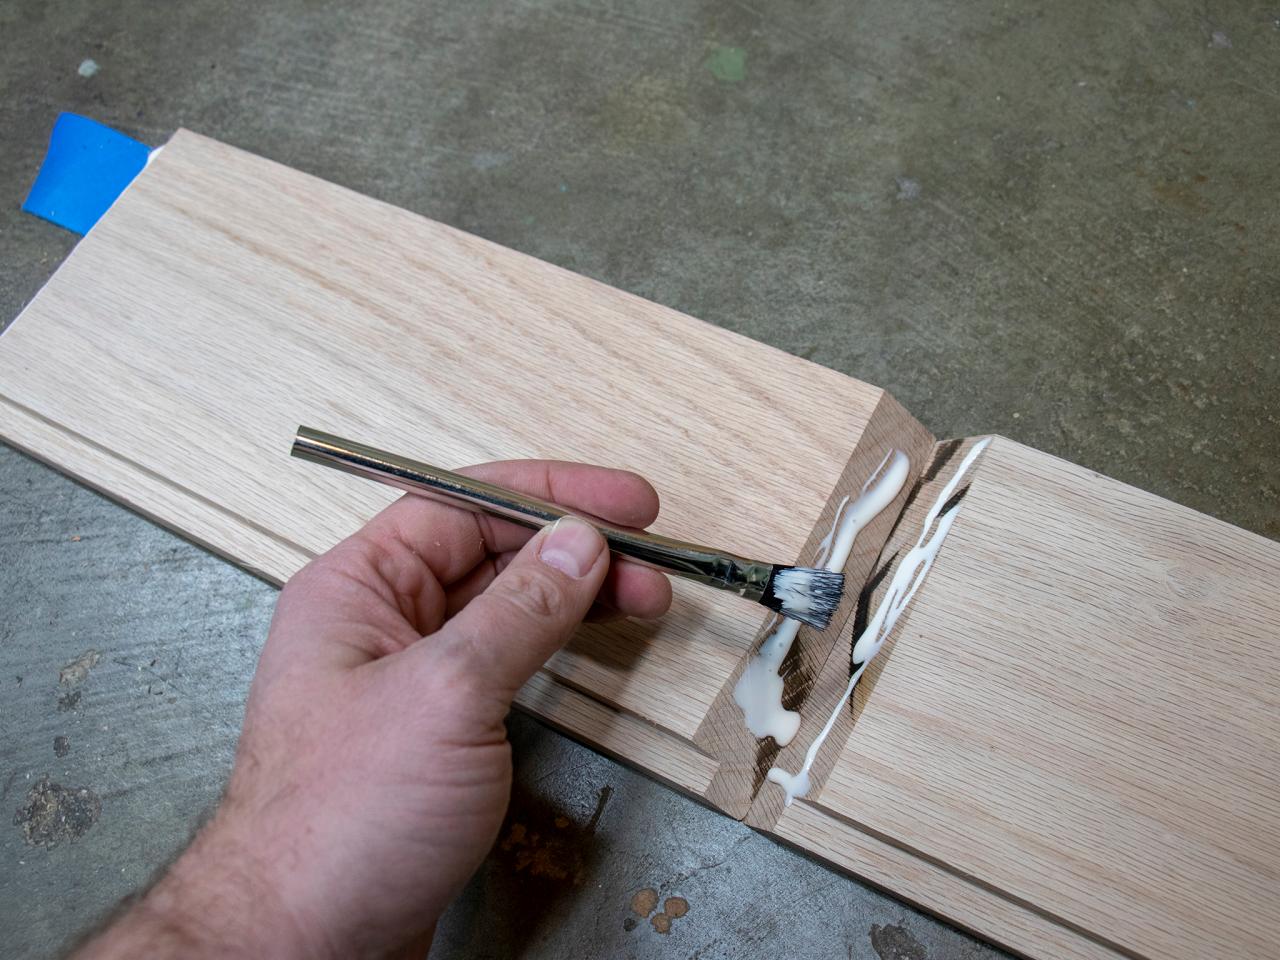
Lay all four sides face down, in the order shown, with the rabbeted edge facing toward you. Make sure the tips of the miters are touching and evenly centered on one another. Then run a length of masking tape down all four sides with a small amount hanging off each end. Gently flip the pieces over making sure that everything stays attached. Then brush a generous amount of wood glue across all of the miters. Fold the box together and use the tape to secure it together while the glue sets up.
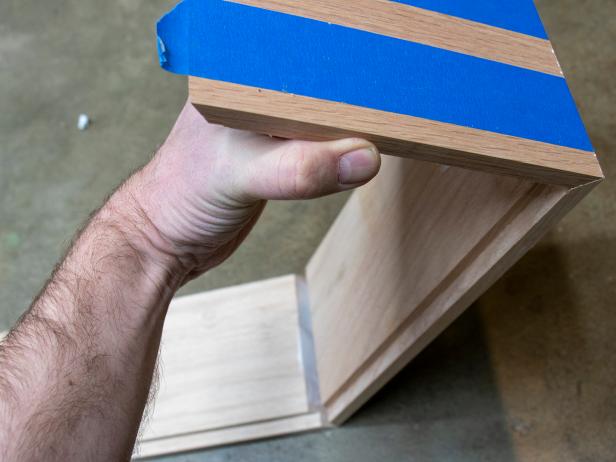
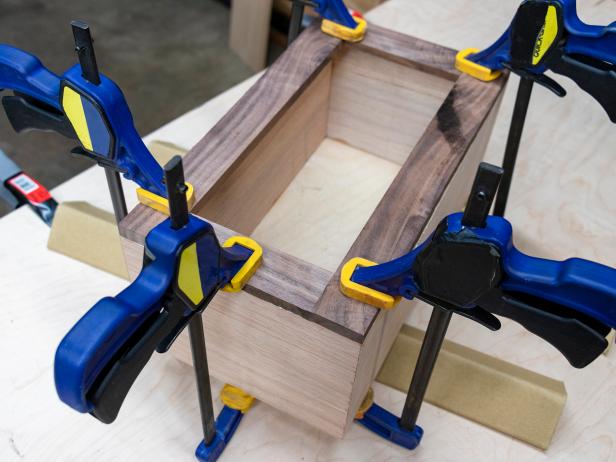
Step 8: Attach Bottom


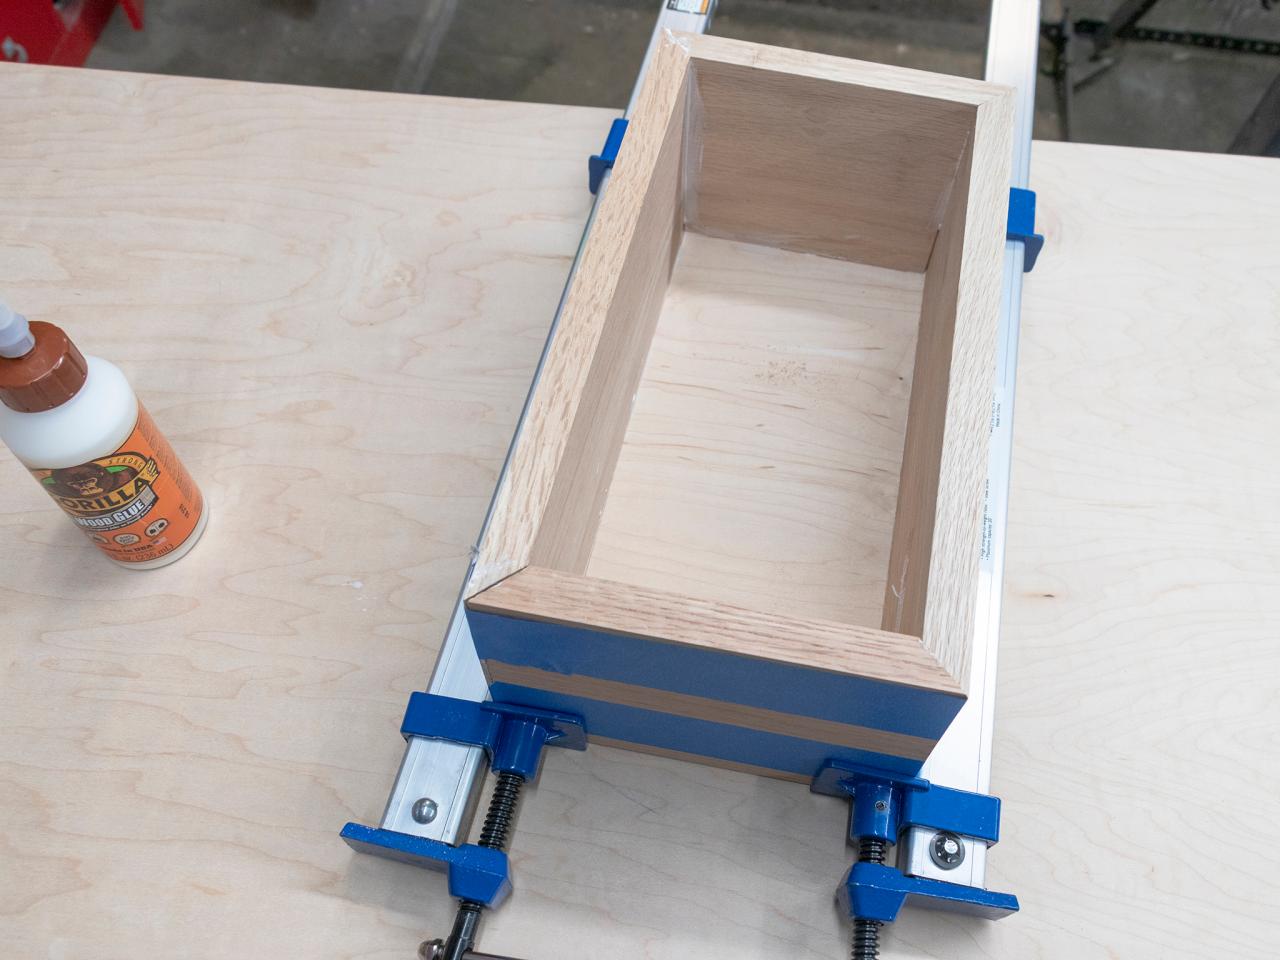
Now that you’ve got the sides glued together and taped securely, you can flip the box so the rabbeted side is facing up and brush in some more glue. Once you’ve done that, insert the plywood bottom and use a pair of clamps to snug everything together while the glue dries for 24 hours.
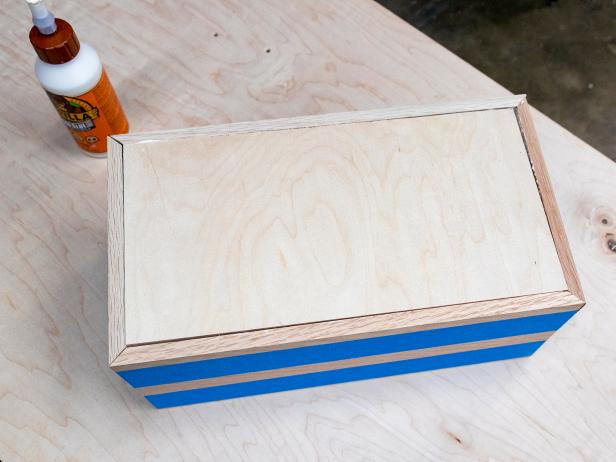
Step 9: Add Trim to Lip
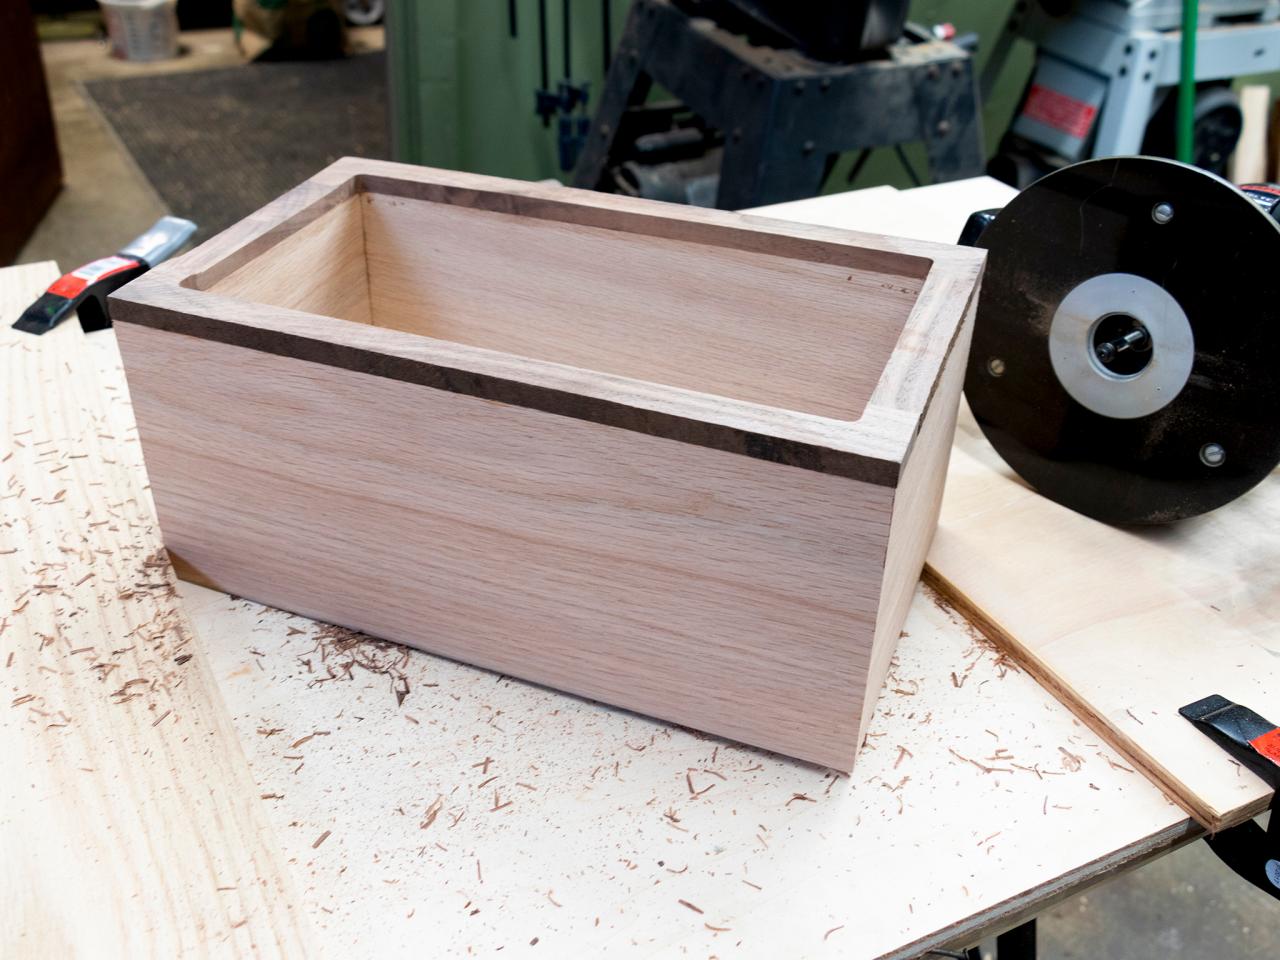
Because the 1x6 boards are technically only 5-1/2” wide, you need to add a little bit of trim to the lip to make sure that your container sits nicely into the box. The easiest thing to do is set your table saw back to 90 degrees and rip a few 1/2” scrap pieces or you can use a small piece of flat trim from the home store as well. Lay the trim neatly around the lip of the box and clamp it tightly into place.
Step 10: Use Router to Clean up Edges

Using your router with a flush trimming bit, clean up the edges of the trim so that they’re flush with the sides of your box. Use a medium speed and make sure the box is braced securely against your work surface so it won’t slip. Follow the inside edge of the box all the way around until you’re satisfied with the results.
Step 11: Sand Everything and Apply Finish
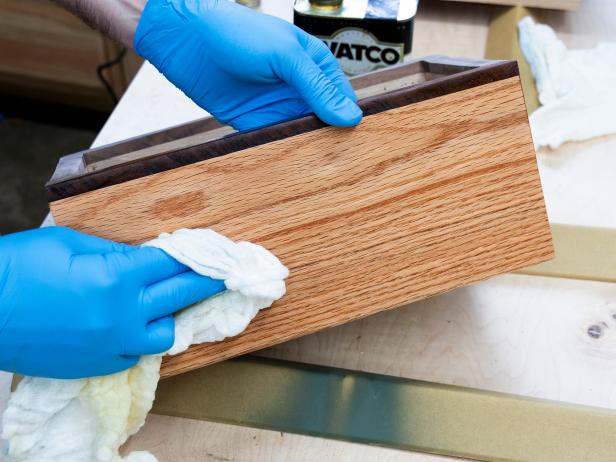
Scrape off any excess glue that may have squeezed out and give your box a good sanding all the way down to 220 grit. After sanding, wipe the surface down with mineral spirits to remove any remaining dust or oils and apply a few coats of wipe-on polyurethane.
Step 12: Apply Rubber Feet to Protect Counters

Apply clear rubber bumpers to the bottom of the box at each corner. It might help to use a little super glue or epoxy if you have difficulty getting them to stick to your box’s finish. This will help prevent scratches or any leaching of the finish on to the countertops.
Step 13: Insert Pan and Get to Work

Your pan should fit nicely into your new box and will be a much more desirable place to put your kitchen scraps. When you need to, you can remove the container and put it in the dishwasher or take it to your compost pile and empty it out.


